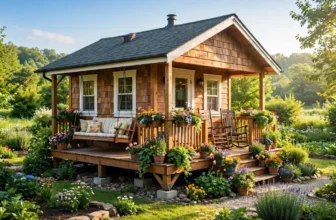
17+ Off-Grid Cabins in the Woods You Can Actually Build Yourself

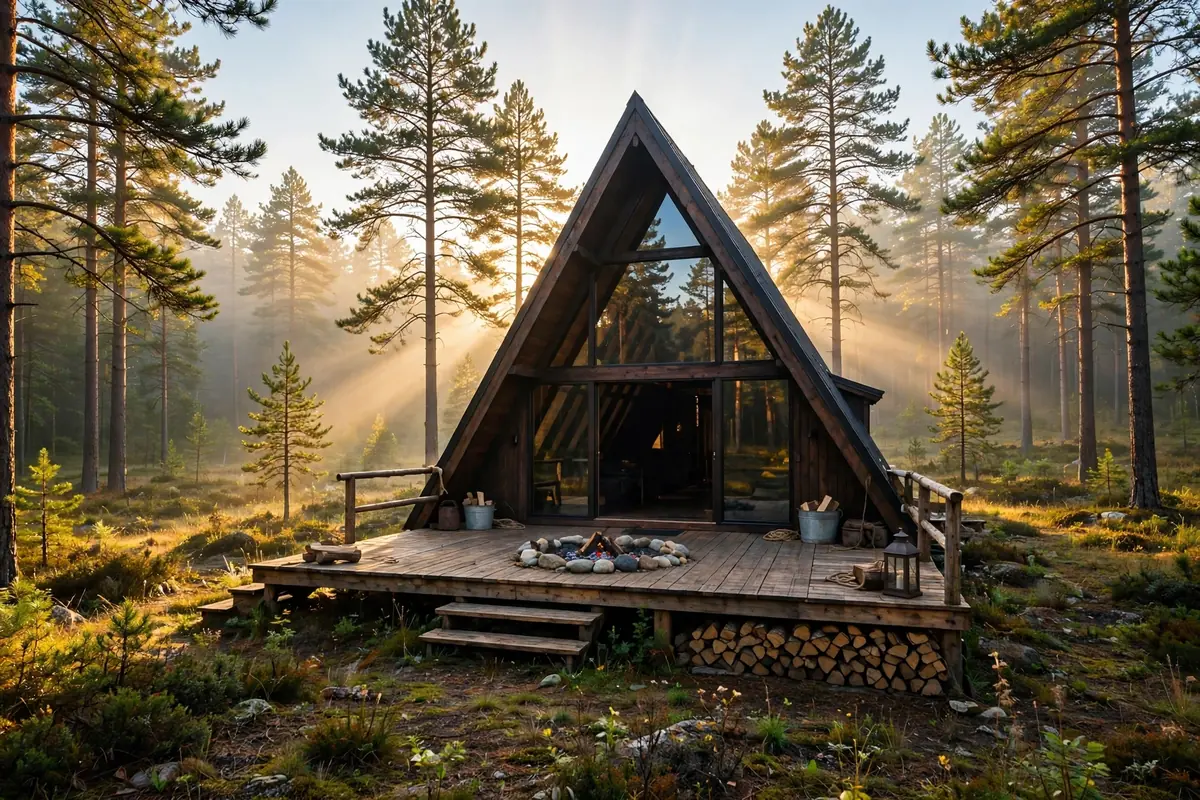
There is a moment, deep in the woods, when a cabin stops being a fantasy and starts being a plan. The trees thin out. The light hits a clearing. You can suddenly see yourself there, coffee in hand, no power bill in the mailbox.
That is the dream behind every cabin on this list. Each one is a real building method that ordinary people have used to build their own off-grid retreat, often with their own hands, often on a tight budget.
None of these cabins needs a mansion budget or a construction crew of twenty. They need a clear plan, a realistic foundation, and a way to handle power, water, and heat without the grid. Some are weekend projects. Some are full time homes. All of them start with the same question: how simple can you go and still be comfortable?
Read through all 17, then pick the build that matches your land, your skills, and your budget. The right cabin is rarely the fanciest one. It is the one you can actually finish.
Before you build: the 4 off-grid systems every cabin needs
Sort these four before you frame a single wall, and the rest of the build gets much easier.
1. The Classic A-Frame

The A-frame is the cabin most people picture first, and for good reason. Two steep roof planes meet at the ridge and run all the way to the ground, so the roof is the walls. That simple shape sheds snow, shrugs off rain, and looks stunning in a forest clearing.
For a DIY builder, the A-frame is forgiving. The frame is a series of identical triangles, so once you get one right, you can repeat it down the length of the cabin. Many builders raise the frame with a few friends over a single long weekend.
The glass gable end is the payoff. It floods the loft with light and frames the trees like a painting. The trade off is heat loss through all that glass, so use good glazing and a wood stove that can keep up.
Keep the footprint modest, around 400 to 600 square feet, and the loft becomes a real sleeping space instead of a crawl space. Add a deck on piers and you have outdoor living from the first summer.
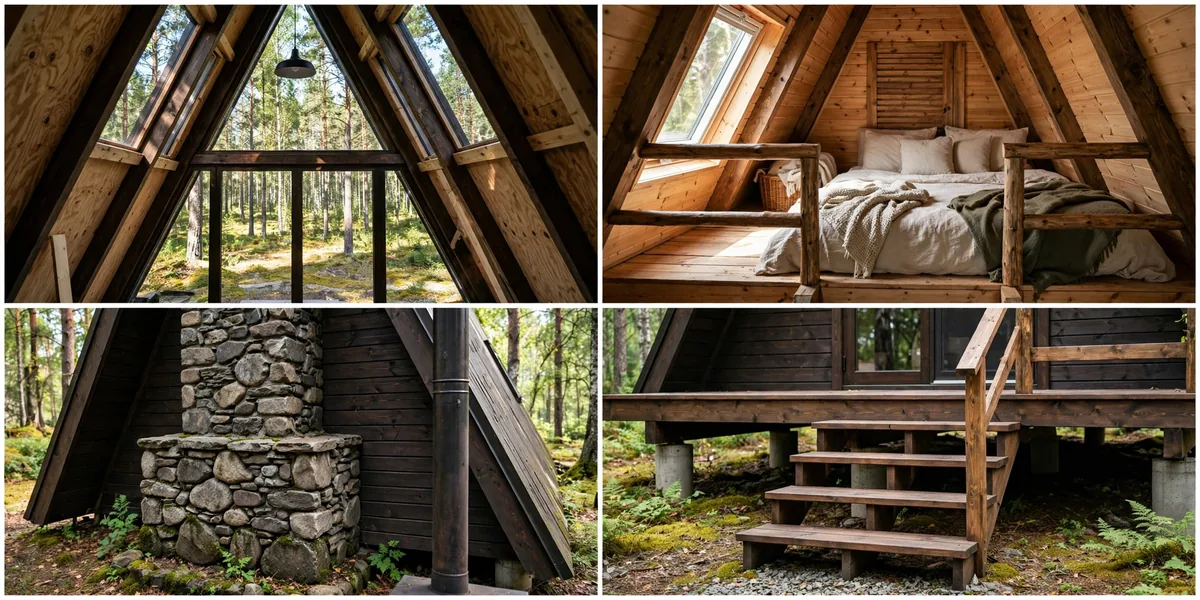
A-frames suit steep or wooded lots well, because the small footprint disturbs little ground. Just make sure the piers are level and well drained.
If you love the look but fear the loft ladder, plan a proper stair from the start. Your knees will thank you on every midnight trip downstairs.
2. The One-Room Log Cabin

Nothing says cabin like real logs. A one-room log cabin is the oldest DIY build on this list, and it still works beautifully. Logs stack, notch at the corners, and form walls that are structure, insulation, and finish all in one.
Hand-peeled logs give the most character, but milled logs are faster and more predictable for a first timer. Either way, the key skill is the corner notch. Get that joint tight and the walls will stand true for generations.
One room keeps everything simple. Cooking, sleeping, and sitting share a single warm space around the stove. That simplicity is the charm, and also the limit. If you need a separate bedroom or a big kitchen, this is not your cabin.
Chinking, the material packed between logs, matters more than most beginners expect. It seals drafts and keeps out insects. Budget real time for it, and do not rush the final coat.

A stone pier foundation keeps logs off damp ground, which is the single best thing you can do for their lifespan. Rot starts where wood meets wet soil.
Keep a woodpile close but not touching the wall. Dry wood by the door is convenient, and a little air gap keeps pests out of the logs.
3. The Timber-Frame Post-and-Beam Cabin

Timber framing is woodworking at its most satisfying. Heavy posts and beams join with mortise and tenon joints, the kind of wood joints that lock together without a single metal bracket. The frame goes up like a giant puzzle, and it is beautiful before a single wall panel is added.
Because the frame carries the load, the walls can be almost anything. Straw panels, timber boards, or insulated panels all fit between the posts. That freedom lets you tune the cabin to your climate and budget.
The open frame also gives you soaring ceilings and big window walls. A timber-frame cabin feels much larger than its square footage, which matters when you are living small off the grid.
This build rewards patience and careful measuring. Cut one beam wrong and the whole frame tells on you. Many first timers take a short timber framing course first, and it pays for itself in confidence.
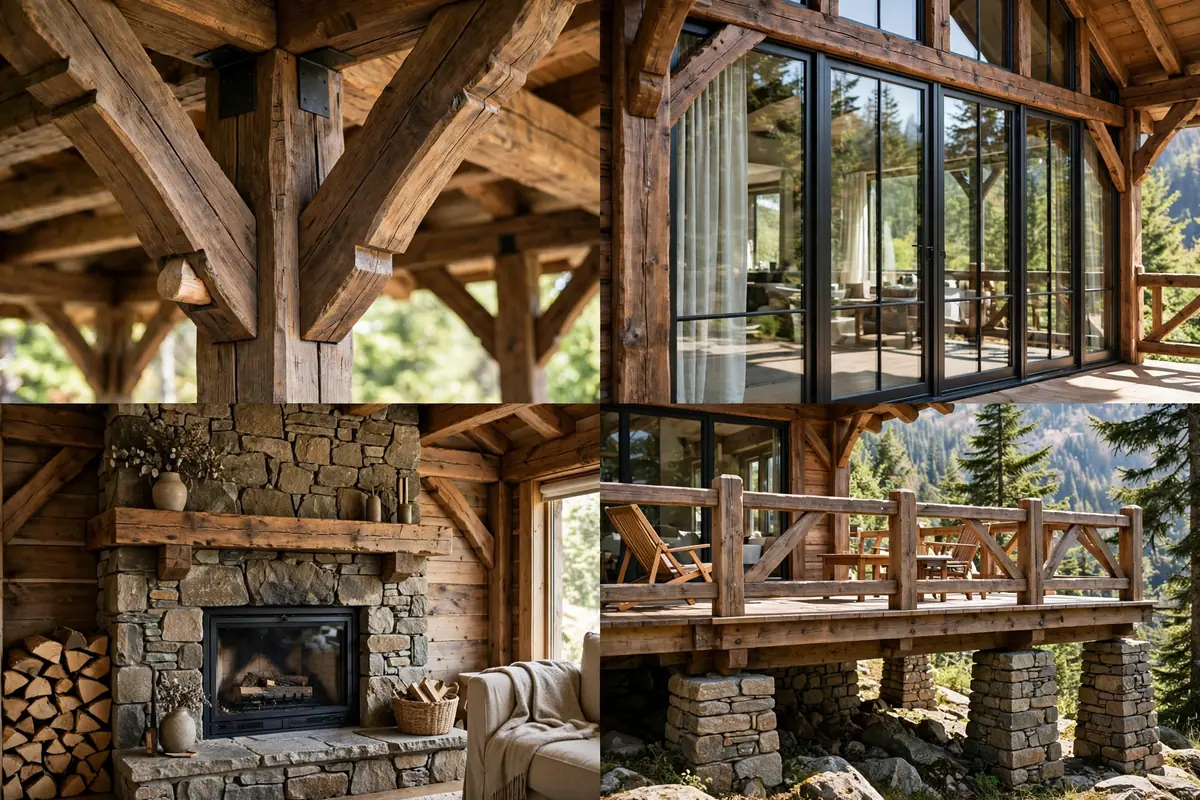
Raise the cabin on stone piers and let the frame breathe. Good airflow under the floor keeps the structure dry and sound.
If heavy beams sound daunting, look for a kit frame. The cutting is done for you, and you still get to raise it yourself.
4. The Round Cordwood Cabin

Cordwood building turns firewood into walls. Short logs are stacked like bricks and set in mortar, with their round ends facing in and out. The result looks like a storybook cottage, and it is surprisingly strong and well insulated.
The round shape is not just cute. A circle has less wall area than a rectangle of the same size, so there is less surface to lose heat through. The conical roof sheds rain in every direction, which suits wet woodland sites.
Cordwood is slow, friendly work. You can build a wall a little at a time, in evenings and weekends, with no heavy lifting beyond a single log. It is one of the best builds for a solo builder on a small budget.
Dry wood is essential. Green logs shrink as they dry and pull away from the mortar, leaving gaps. Season your cordwood for a full year before you build, and your walls will stay tight.

The round interior takes some planning. Furniture does not sit neatly against a curved wall, so build in benches and shelves that follow the curve.
A central wood stove suits a round cabin perfectly. Heat radiates evenly in all directions, and every seat in the room is a good seat.
5. The Straw-Bale Woodland Retreat

Straw bales sound fragile, but a well built straw-bale wall is thick, quiet, and superbly insulated. Bales stack like giant bricks, get pinned together, and are plastered inside and out. The finished wall can be nearly two feet thick.
That thickness is the magic. Deep window recesses turn every window into a little nook. Sound from outside barely reaches inside. Winter heating bills, or rather woodpiles, shrink fast.
Straw bale suits a DIY builder because the material is cheap and forgiving. You can lift a bale, trim it, and restack it without special tools. The plastering is messy, physical work, but it is also the most satisfying part of the build.
Moisture is the enemy. Keep bales dry during construction, give the roof generous overhangs, and raise the walls on a solid, waterproof foundation. A dry bale lasts indefinitely. A wet one does not.

Wide overhangs are not decoration on a straw-bale cabin. They are the umbrella that keeps the plaster dry in driving rain.
Plaster in thin coats and let each one cure. Patience here gives you walls that look handcrafted and last for decades.
6. The Reclaimed Barn-Wood Cabin

Old barns are full of timber that is too good to burn. Reclaimed barn wood carries nail holes, weathered grain, and a century of character that new lumber simply cannot fake. Built into a cabin, it tells a story before you even hang a picture.
Sourcing is half the project. Check demolition yards, farm sales, and local listings for barns coming down. Take only sound boards, and check every piece for rot, insects, and hidden nails before you haul it home.
Reclaimed wood pairs best with a simple cabin shape. Let the material be the star. A plain gable roof, a small porch, and honest joinery will show off the timber better than fancy details ever could.
Budget extra time for cleaning and de-nailing. It is slow work, but it is also free wood in exchange for patience. Many builders say the de-nailing weekends are when the cabin starts to feel like theirs.
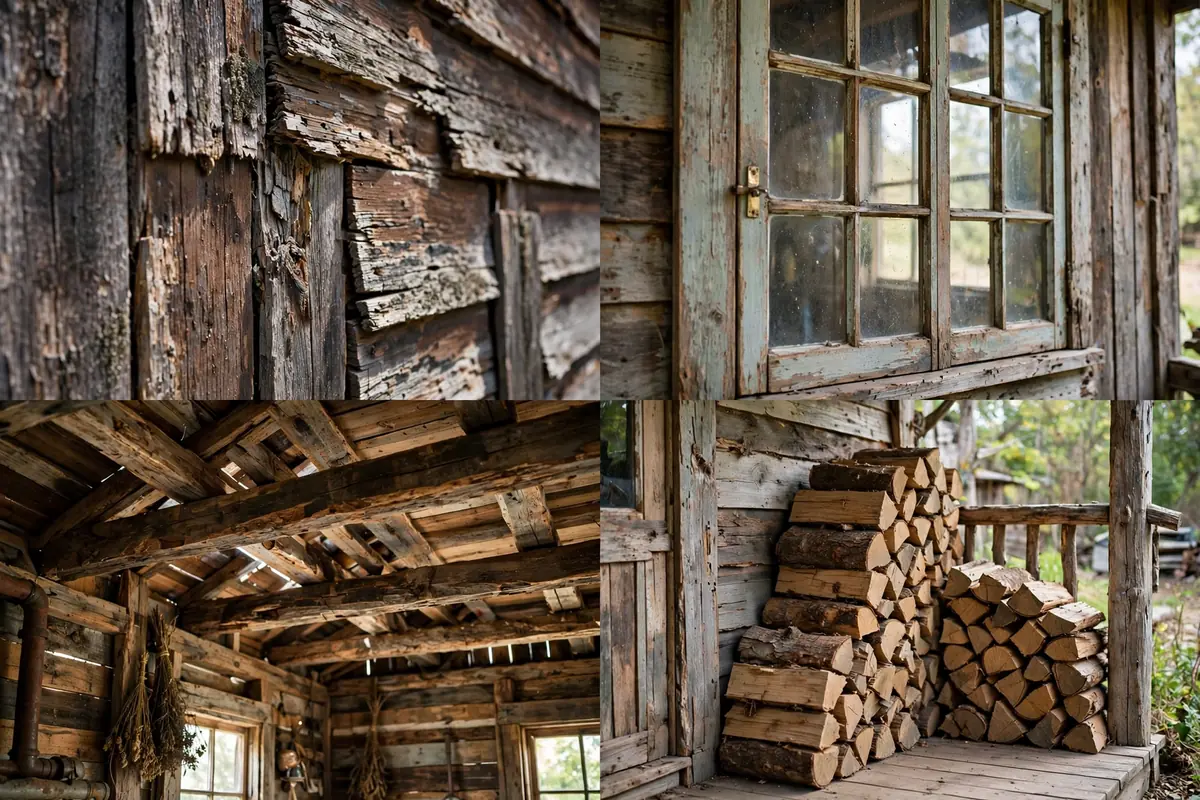
Mix board widths on purpose. The patchwork look is the point, and it hides the fact that no two salvaged boards are ever the same size.
Seal reclaimed siding well on the weather side. Old wood has already survived decades outdoors, and a good finish helps it survive decades more.
7. The Cabin on Skids

A cabin on skids is exactly what it sounds like. The whole structure sits on heavy timber beams, called skids, instead of a permanent foundation. When you need to move, a truck or tractor can drag it to a new spot.
That mobility changes the rules in many areas. A cabin on skids is often classed differently from a permanent home, which can simplify permits. Always check your local rules first, because this varies a lot from county to county.
Keep the size modest, since the cabin has to travel in one piece. Around 200 to 400 square feet is the sweet spot. Inside, every inch has to earn its place, so plan storage into stairs, benches, and bed bases.
The build itself is approachable. A level skid base, a simple floor frame, and standard wall framing are skills any keen beginner can learn. Many skid cabins go up in a few weekends of steady work.
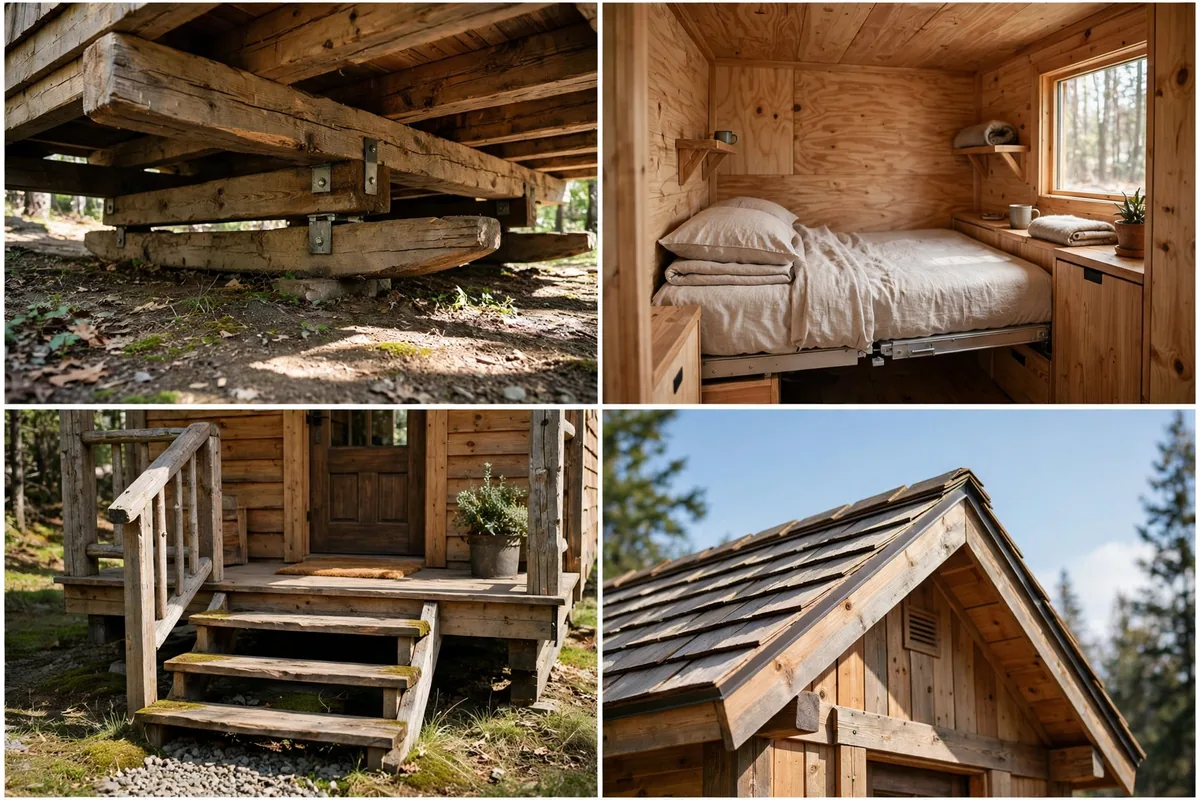
Level the skids on gravel pads, not bare soil. Gravel drains, soil holds water, and dry skids last far longer than wet ones.
If you ever plan to move the cabin, keep the roof height low enough for the roads it will travel. Measure bridges and wires on the route before you build tall.
8. The Earth-Berm Hillside Cabin

An earth-berm cabin uses the hill itself as insulation. Soil is banked against three sides of the cabin, leaving only the front wall open to the view. The earth keeps temperatures steady through summer heat and winter cold.
Building into a slope also hides the cabin from the road and the wind. From uphill, you might see only a grass roof and a glass wall peeking out of the hillside. It is the most discreet cabin on this list.
Waterproofing is everything here. The walls that touch soil need proper drainage, a waterproof membrane, and a way for water to escape instead of pooling. This is the one detail you must not improvise.
Inside, the front glass wall does heavy lifting. It brings in daylight and passive solar heat, balancing the cool, cave-like feeling of the bermed walls. Orient that glass toward the winter sun if you can.
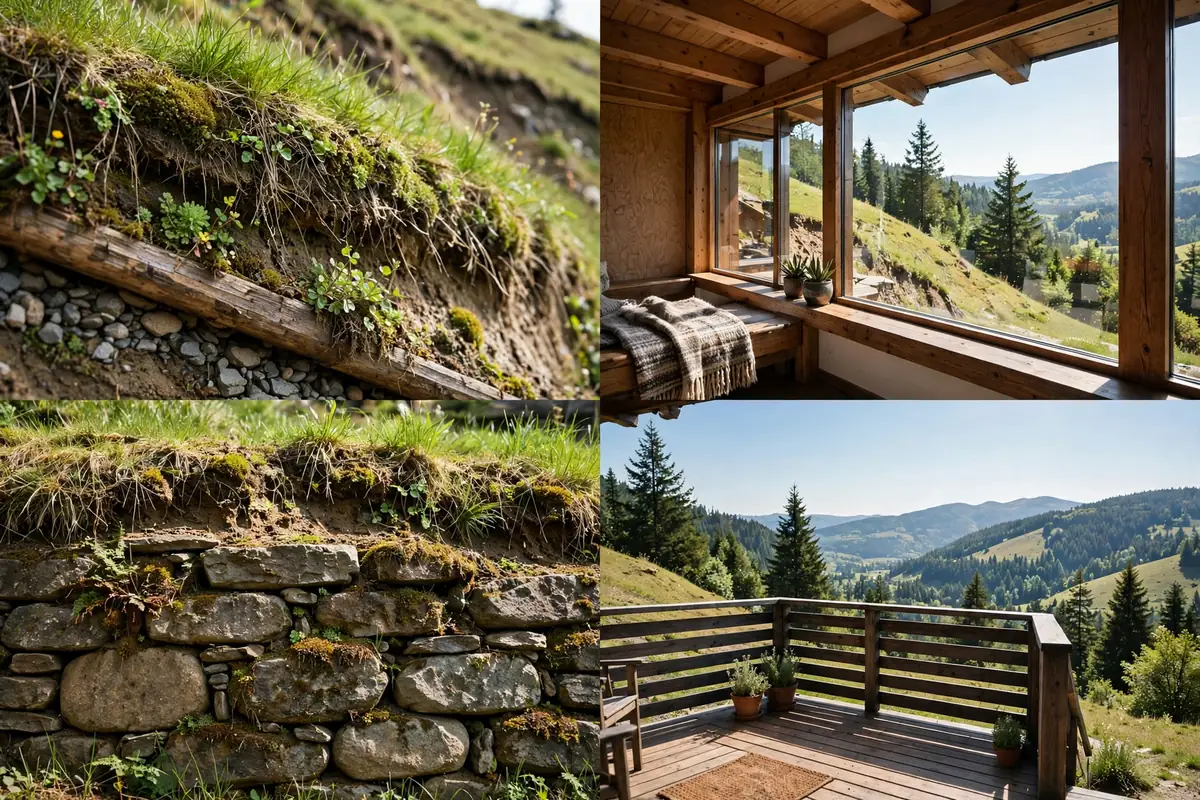
Stone retaining walls hold the berm in place and look wonderful doing it. Build them to drain, with gravel behind, and they will outlast the cabin.
Plan your access before you dig. Getting materials to a hillside site is harder than building on flat ground, so stage deliveries carefully.
9. The Container Cabin in the Pines

A shipping container is a steel box built to survive ocean storms, so as a cabin shell it starts out strong, watertight, and fast. Cut in windows and a door, insulate it well, and you have a weatherproof room in a fraction of the time of a stick build.
Cladding the outside in wood changes everything. It softens the industrial look, adds a layer of insulation, and helps the cabin sit happily among pine trees instead of looking like a freight yard leftover.
Insulation deserves real thought. Steel conducts heat, so an uninsulated container is freezing in winter and an oven in summer. Most successful builds insulate on the outside, which keeps the steel warm and avoids condensation inside.
Set the container on concrete piers and you get airflow underneath, easy leveling on uneven forest ground, and space to run pipes and wires. It is a simple foundation that suits woodland sites well.

One container makes a fine studio or weekend cabin. Two containers, joined or spaced apart, make a surprisingly comfortable full time home.
Check the container’s history before you buy. A clean, single-trip container costs more but saves you from mystery cargo residues and rust repairs.
Rough build cost bands: what each style usually costs
DIY labor, basic off-grid systems, 2026 US ranges. Land, permits, and wells are extra.
10. The Stone-and-Timber Cabin

Stone and timber is the classic mountain combination. Stone walls anchor the cabin to the ground and shrug off weather, while timber above keeps the upper rooms warm and light. Together they look like they grew out of the hillside.
Stone work is slow and physical, but it is also one of the most forgiving crafts to learn. Each stone finds its place, mortar fills the gaps, and small mistakes disappear into the overall texture. Nobody inspects a stone wall stone by stone.
Keep the stone to the lower story or a single feature wall if you are new to masonry. A full two-story stone build is a major undertaking. A stone base with timber above gives you the look with a fraction of the lifting.
A stone chimney and fireplace pair naturally with this style. Masonry holds heat long after the fire dies down, warming the cabin through the night on stored warmth alone.
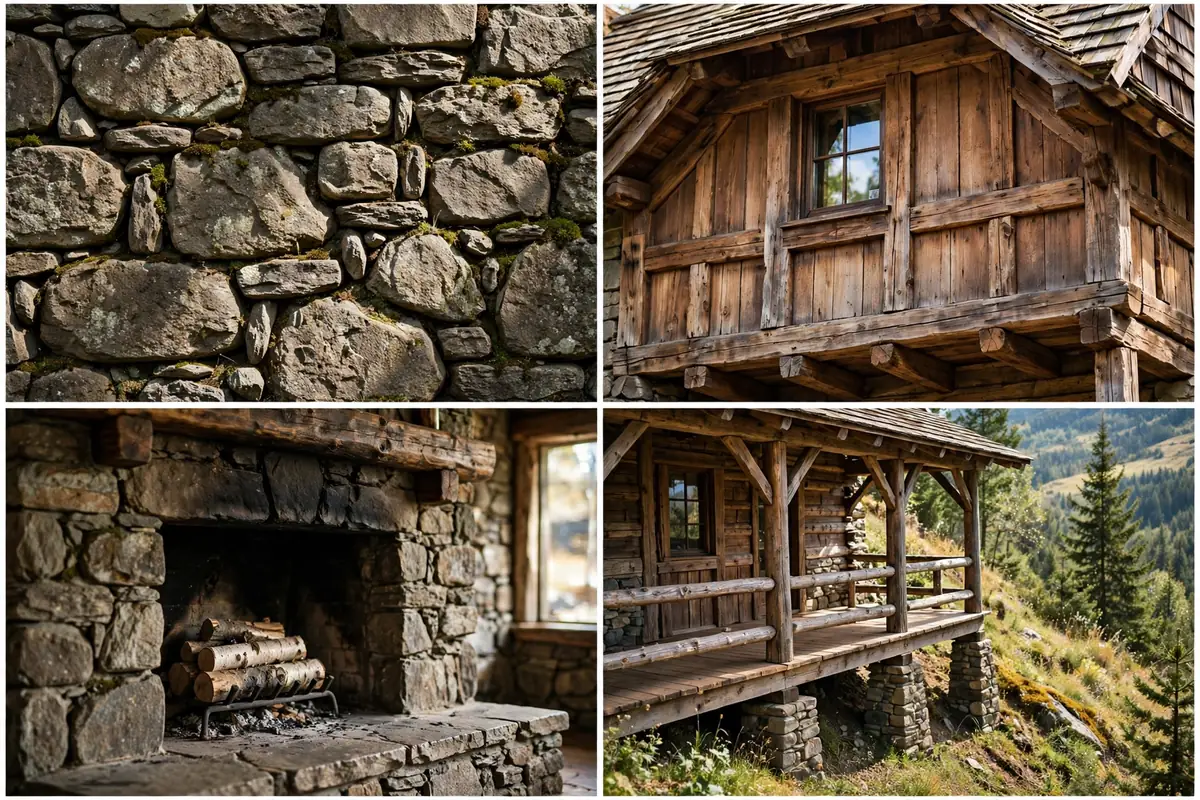
Build on a slope with care. Step the foundation down the hill in terraces instead of trying to force one flat level across the whole site.
Collect stone locally if you can. It matches the landscape, costs little, and saves a fortune in delivery charges.
11. The Board-and-Batten Weekend Cabin

Board-and-batten siding is one of the simplest ways to make a cabin look finished. Wide vertical boards go up first, then narrow battens cover the seams. The vertical lines draw the eye upward and make even a small cabin feel tall.
This is a great first build because the framing is standard and the siding is forgiving. Small gaps hide under battens, and a slightly wavy board just adds character. You do not need cabinetmaker precision to get a beautiful result.
White-trimmed windows pop against natural wood siding and give the cabin a crisp, cared-for look. Keep the trim simple and consistent, and the whole building reads as one calm design instead of a collection of parts.
As a weekend cabin, this style shines. It goes up fast, it is easy to lock up and leave, and a small wood stove brings it back to life within an hour of your arrival on a Friday night.

Paint or stain the boards before you hang the battens, so every edge is sealed. Touching up behind a batten later is nobody’s idea of fun.
A covered porch doubles the usable space in good weather. Even a narrow porch gives you a dry place for boots, firewood, and morning coffee.
12. The Two-Story Loft Cabin

A loft cabin squeezes two floors out of a small footprint. Downstairs holds the kitchen, sitting area, and bathroom. Upstairs, tucked under the roof, is a sleeping loft open to the room below. It is the tiny-home trick that makes a small cabin sleep a crowd.
The tall gable shape is what makes the loft work. A steep roof gives you standing room in the middle of the loft and cozy, low eaves at the edges for beds and storage. A shallow roof gives you a loft you can only crawl into, which gets old fast.
Light matters enormously in a loft cabin. A tall window wall downstairs throws light up into the loft, so the sleeping space never feels like a dark attic. Add a small loft window and you get cross breezes in summer too.
Plan the stair or ladder early, not as an afterthought. A proper stair eats floor space but makes the loft genuinely usable every day. A ship’s ladder saves space but suits weekend use better than full time living.

Guard the loft edge properly. A simple rail or half wall keeps sleepy people safe and makes the loft feel like a real room.
Heat rises, so a loft can get toasty while downstairs stays cool. A small fan at the ridge pushes warm air back down in winter.
13. The Round Yurt-Platform Cabin

A yurt is a round, tent-like structure with a long history, and putting one on a proper wooden platform turns it from camping gear into a real cabin. The platform gives you a level floor, insulation underneath, and a deck that wraps around the whole circle.
The round shape has a lovely effect indoors. There are no dark corners, sound travels softly, and a central stove or skylight becomes the natural heart of the room. People gather in circles without thinking about it.
For a DIY builder, the platform is the main construction job. The yurt itself usually arrives as a kit with poles, lattice walls, and a cover. Raising it is a satisfying day’s work with a few helpers, more like assembling than building.
Yurts suit mild to moderate climates best, or woodland sites where you add insulation and a solid stove for winter. In harsh winters, plan extra insulation and be ready to clear snow from the roof.
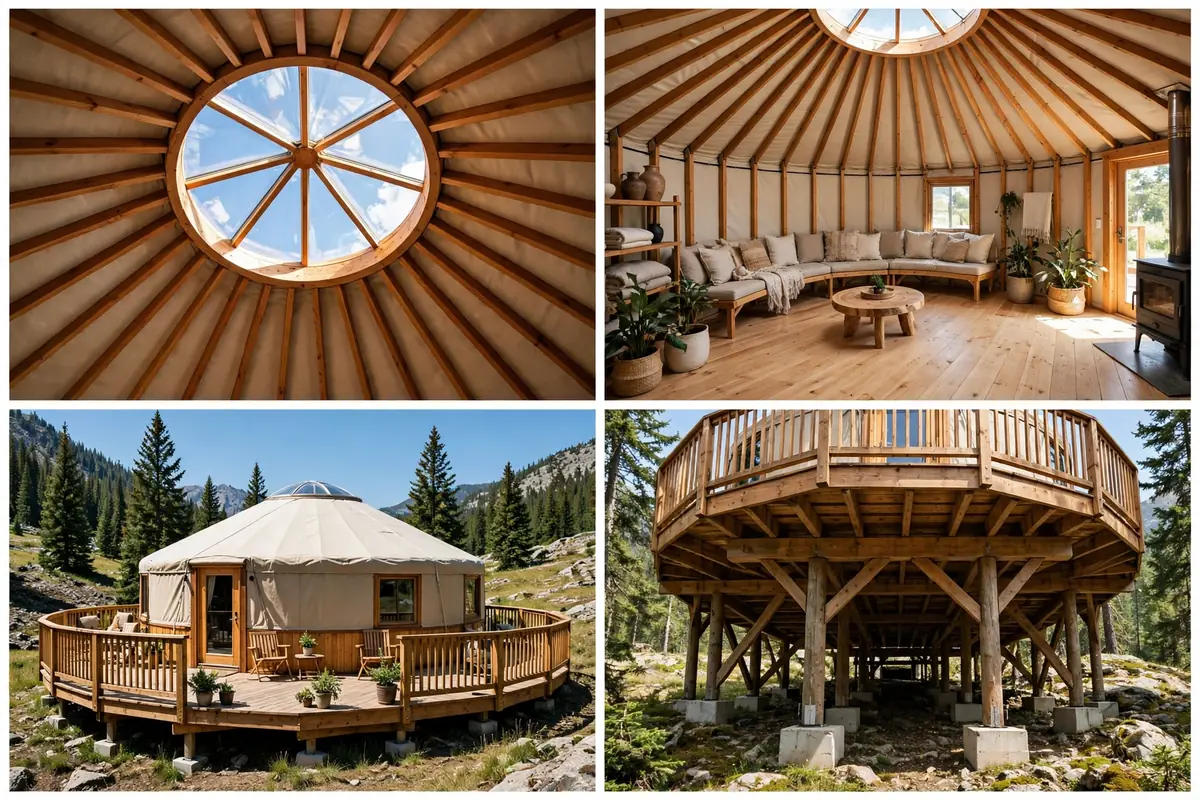
Raise the platform on piers for airflow and to keep the floor dry. A damp platform is the fastest way to shorten a yurt’s life.
The wraparound deck is not a luxury here. It is where muddy boots stay, firewood stacks, and summer evenings happen.
14. The Dogtrot Cabin

A dogtrot cabin is two small cabins joined by a covered open breezeway, and that breezeway is the genius of the design. It is an outdoor room with a roof, cool in summer, sheltered in rain, and perfect for sitting out no matter the weather.
The split layout gives you natural privacy. One side can be bedrooms, the other living and cooking, with the breezeway between them. Guests get their own side without feeling exiled, and families get breathing room in a small total footprint.
Historically, dogtrots were built in hot climates, where the breezeway funneled breezes through the house. That still works today, and it makes a dogtrot one of the most comfortable cabins to live in without air conditioning.
Each side is a simple rectangular build, so construction stays approachable. You are essentially building two small cabins and a roof between them, rather than one complicated structure.

Furnish the breezeway like a room, not a corridor. A bench, a couple of chairs, and a lantern turn it into the place everyone ends up.
In cold climates, add screens or removable panels to the breezeway. You keep the airflow in summer and gain a sheltered porch in winter.
15. The Upcycled Materials Cabin

An upcycled cabin is built from what other people threw away. Salvaged windows, old doors, corrugated metal, leftover lumber, and reclaimed fixtures all find a second life. No two upcycled cabins ever look alike, and that is exactly the point.
The trick is to let the materials lead the design. Found a beautiful set of old windows? Size the wall around them. Got a stack of corrugated roofing? That sets your roofline. Designing backward from what you have saves money and creates a cabin with real personality.
This build suits patient scavengers. You will spend weekends at salvage yards, demolition sites, and online listings, collecting pieces before you ever frame a wall. For many builders, the hunt is half the fun.
Be strict about condition. Salvaged wood must be sound, windows must seal, and anything structural must be graded or checked. Saving money is smart. Building with rotten timber is not.

A rain barrel by the porch is a small, practical touch that fits this cabin perfectly. It waters the garden and reminds you the cabin lives lightly on the land.
Keep a consistent paint or stain palette across mixed materials. One unifying color ties a patchwork of salvaged pieces into a coherent home.
16. The Modern Black Solar Cabin
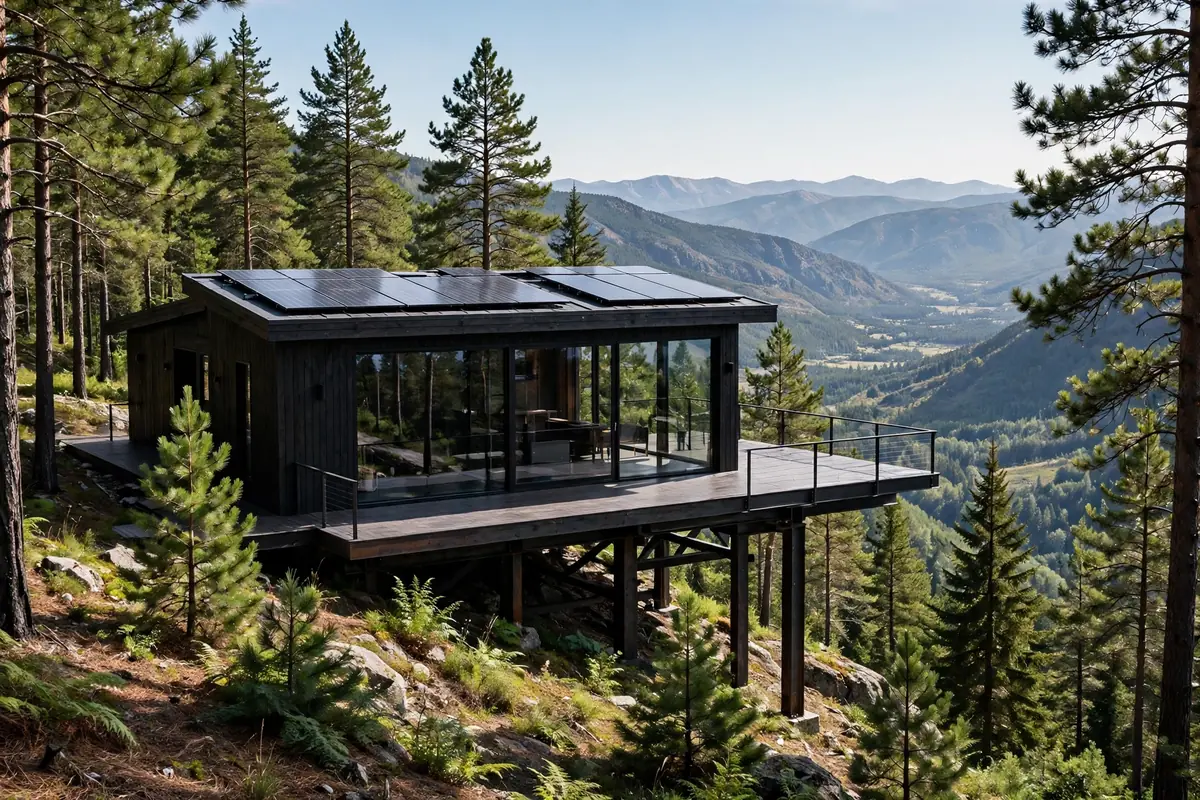
Black timber, huge glass, and a quiet roofline. The modern black cabin is the minimalist of the group, and it photographs like a dream against green pines. Dark siding recedes into the forest shadows, so the glass wall becomes the whole show.
Solar panels suit this design naturally. A simple pitched roof gives you a clean, unshaded surface for panels, and the modern look means the panels read as part of the design rather than an afterthought.
Inside, keep it calm. Pale wood, simple furniture, and nothing you do not need. The view through the glass wall is the decoration, and clutter only competes with it.
Black siding absorbs heat, which helps in cold climates and hurts in hot ones. If your summers are fierce, add ventilation, shade, and lighter interior finishes to balance the dark exterior.
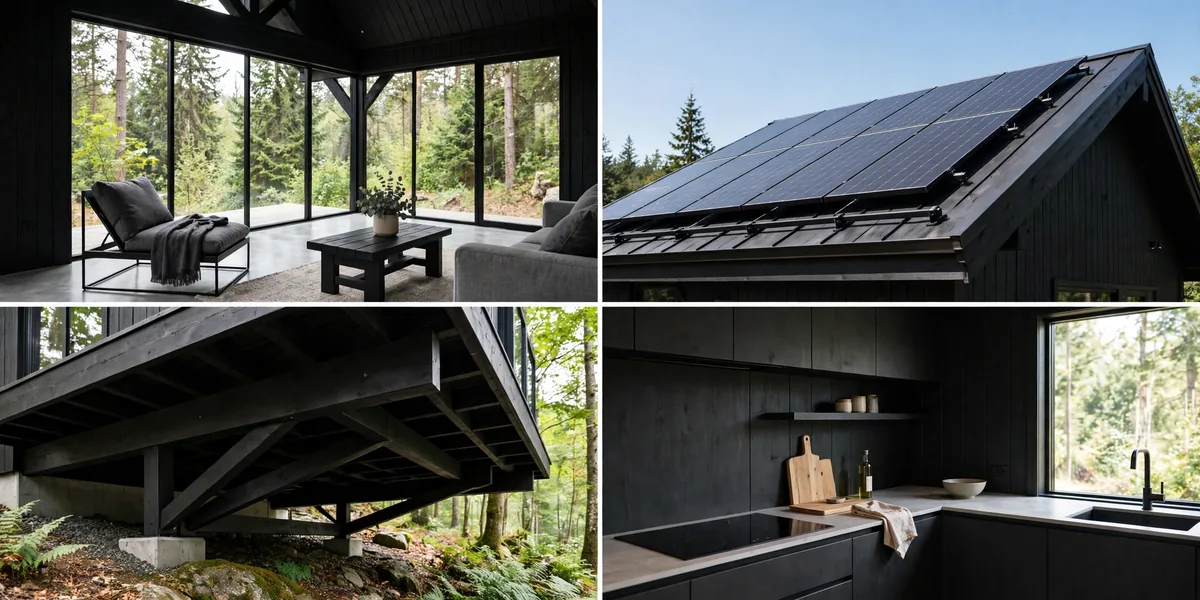
A cantilevered deck needs proper engineering. The steel supports are not decoration, so have them sized by someone who does the math for a living.
Choose a high-quality dark stain, not cheap paint. Good stain weathers gracefully on timber, while cheap paint peels and shows every flaw.
17. The Family Bunkhouse Cabin
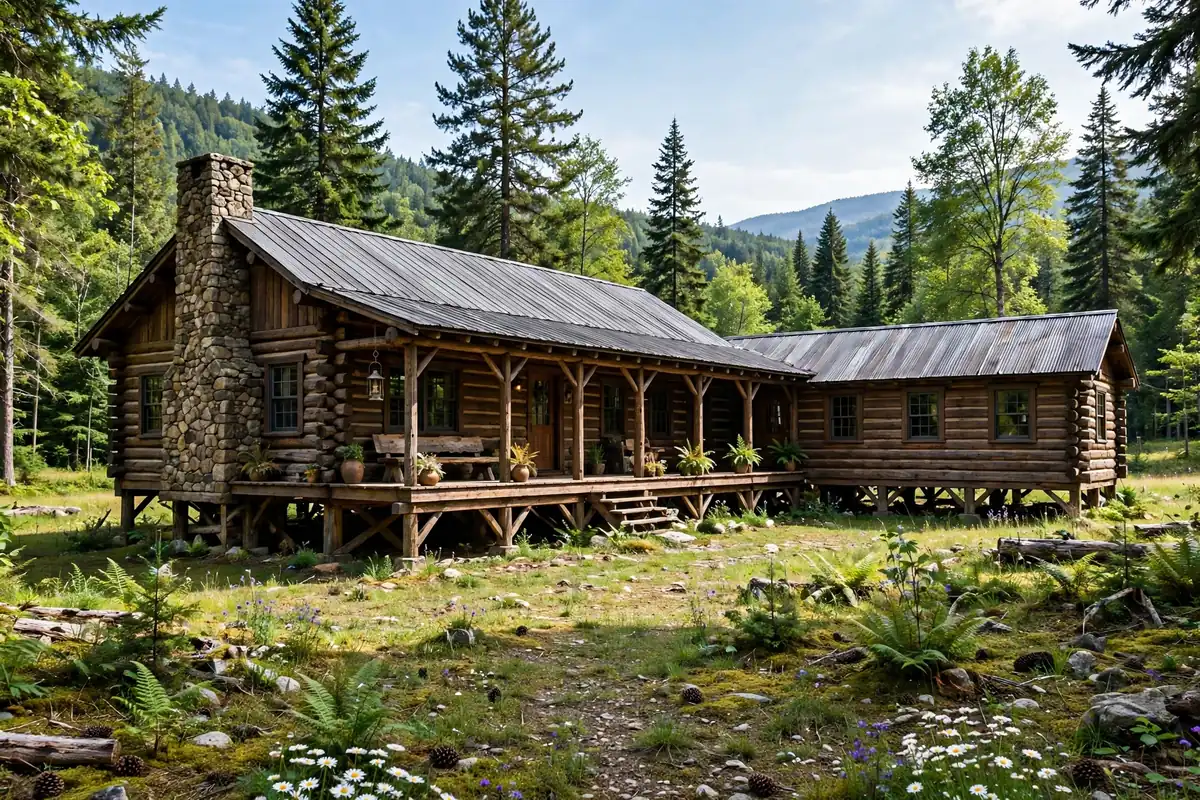
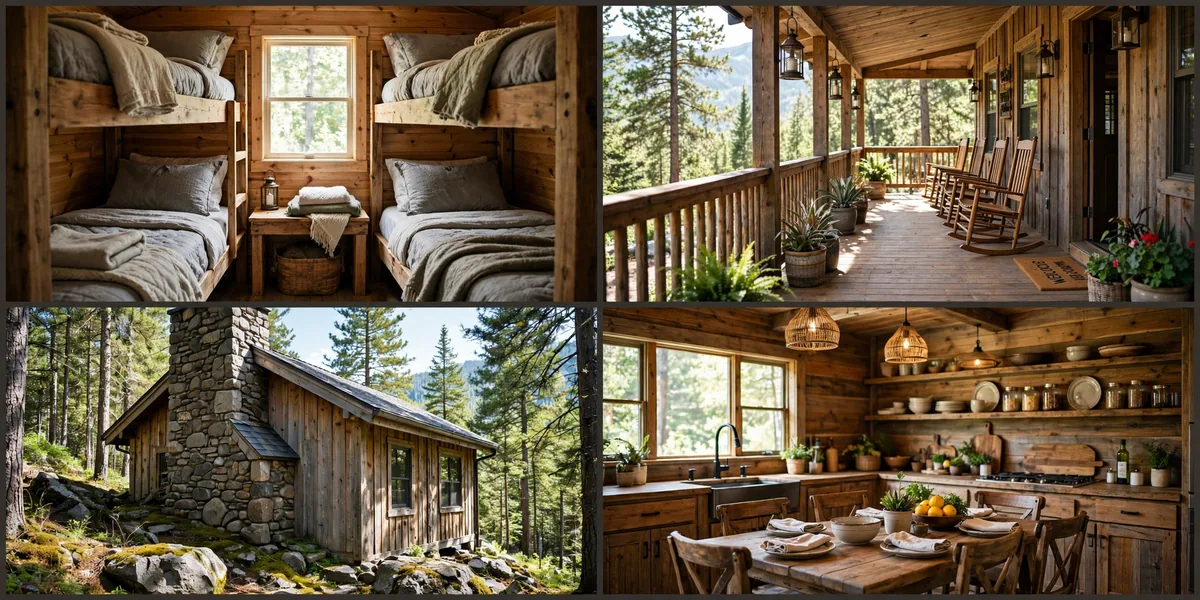
Some cabins are for two people and a dog. This one is for the whole crew. A family bunkhouse adds a dedicated bunk room wing to a comfortable main cabin, so kids, cousins, and friends all have a real bed instead of an air mattress on the floor.
The layout works because the noisy, social spaces stay separate from the sleeping spaces. The main cabin holds cooking, eating, and gathering. The bunk wing holds beds, hooks, and a little bit of chaos, contained.
Bunks are a brilliant use of small space. Two or three bunks along one wall sleep six in the footprint of a single bedroom. Add a reading light and a small shelf per bunk, and even teenagers stop complaining.
The wide front porch is the shared heart of this cabin. It is where the group gathers after a day in the woods, where meals stretch long, and where the cabin earns its keep as a family place.
Plan one bathroom per sleeping wing if you can. Morning queues are the fastest way to ruin a family weekend, and a second simple bathroom is worth every penny.
Build the bunk room with wipe-clean surfaces and sturdy bunks. Family cabins take joyful abuse, and materials that shrug it off age far better than delicate finishes.
Your first 5 steps, in order
Do these before you buy lumber, a container, or a single solar panel.
So which cabin would you build? The A-frame lover and the cordwood builder want very different weekends, and both are right.
Start with your land and your honest skill level. Then choose the cabin you can finish, not just the one you love in photos. A finished small cabin beats an unfinished dream cabin every single time.
Pick one design, price its foundation and its off-grid systems, and talk to your local building office before you spend a cent. That one conversation saves more builds than any tool in your shed.
Then get out there, clear a little ground, and start. The woods are waiting, and the best cabin on this list is the one with your name on the door.