15+ Container Home Interiors With Warm Wood and Zero Industrial Coldness

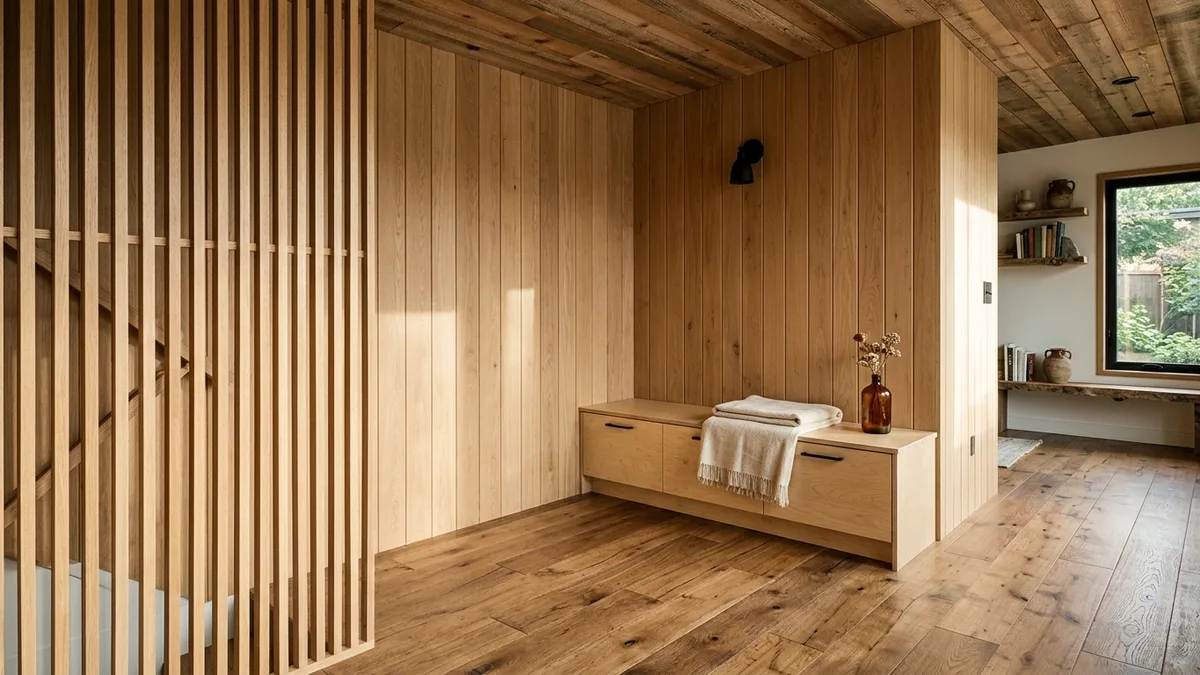
You will learn exactly how to transform a cold metal shell into a deeply tactile, enveloping home using twelve thousand dollars of carefully allocated interior wood finishes.
Most builders make the fatal mistake of hanging standard drywall directly against corrugated steel ribs, ignoring how thermal expansion and condensation will eventually crack every joint.
For anyone planning a rural Austin property outfitting within a strict four-week woodwork installation timeline, that mistake results in expensive repairs and a stubbornly sterile, industrial echo.
Every specific layout, species choice, and dimension detailed below solves a concrete spatial constraint within your single forty-foot high-cube container.
Quick Tips Before You Start
Acclimate Wood
Let all interior timber acclimate inside the container for 7 days before final installation.
Check Clearances
Always account for a 2-inch interior framing loss on each side of your 8-foot-wide steel box.
Seal UV Exposure
Use matte UV-blocking sealants on south-facing wooden walls to prevent premature fading.
1. Full-Coverage Vertical White Oak Wall Paneling
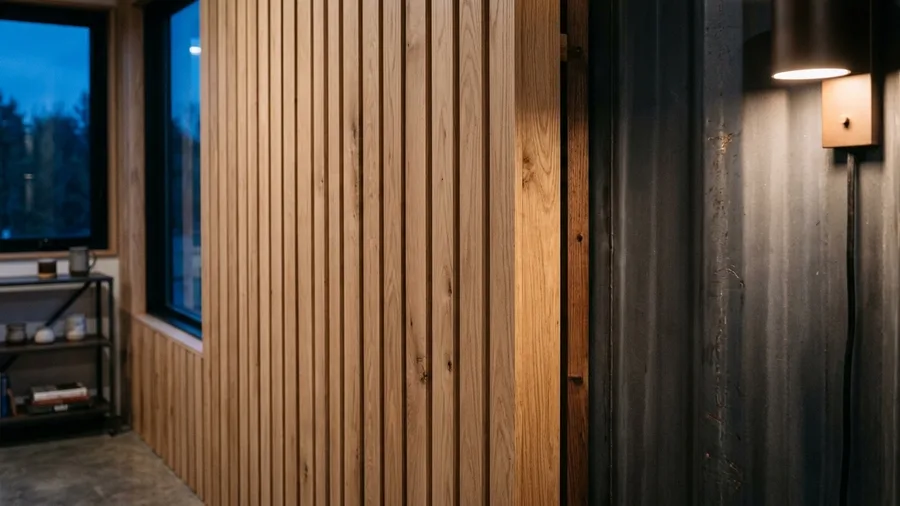
Most builders try to hang standard drywall directly against metal ribs to mimic a conventional home, ignoring how thermal expansion causes joints to fracture within months. Wrapping corrugated steel walls in continuous vertical oak slats completely erases the container geometry.
Install 1×3 inch white oak slats over vertical furring strips attached directly to the steel ribs.
Maintain a strict 1/4-inch shadow gap between boards for a clean, modern look that allows natural wood movement.
Apply a matte water-based polyurethane to prevent yellowing over time and keep the grain looking raw.
💡 Tip: Pre-drill all face-nail holes to prevent splitting the dense white oak slats.
🌱 GROWING TIP
Mastering The Shadow Gap
Use a 1/4-inch router bit spacer as you nail up each oak slat to keep your shadow lines perfectly straight down the 40-foot span.
2. Reclaimed Cedar Planked Ceiling
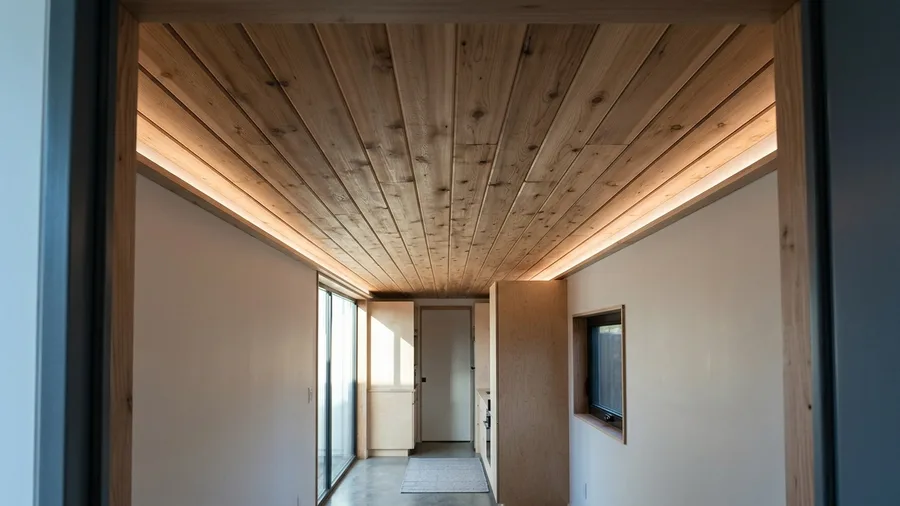
An eight-foot ceiling clearance inside a narrow metal shell creates instant vertical compression unless the overhead plane is deliberately styled to trick the eye.
Fix this limitation by attaching lightweight 3/8-inch tongue-and-groove cedar planks directly to the ceiling framing without overloading the structural limits of the steel box.
The warm reddish-brown tones and rich knotty grain immediately absorb the harsh industrial glare that bounces off standard drywall or exposed corrugated steel.
Embed a perimeter LED channel lighting strip along the wall joints to cast a soft wash upward across the wood grain, creating the illusion of a floating, higher plane.
Finish the installation with a low-VOC penetrating oil to seal the cedar while maintaining a flat matte texture that feels authentically organic overhead.
Ceiling Installation At a Glance
3. Wide-Plank Engineered Hardwood Flooring
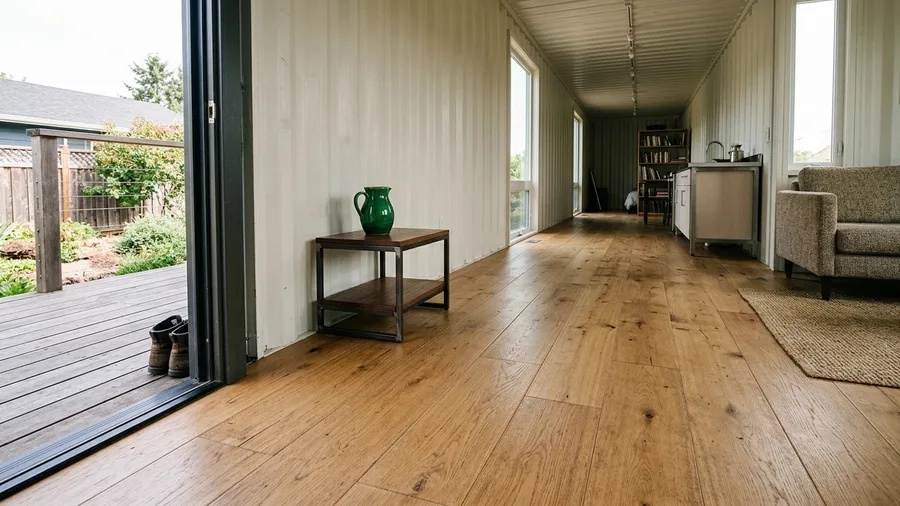
Wide-plank white oak flooring creates an expansive horizontal warmth that immediately grounds the entire footprint of a single 40-foot high-cube container.
Solid hardwood will cup and warp over a steel container subfloor due to fluctuating humidity and thermal transfer.
Install sound-dampening acoustic underlayment directly over the corrugated metal subfloor to eliminate hollow footsteps and deaden vibrations before laying boards.
Choose 7-inch wide engineered oak boards for superior dimensional stability across changing seasons in rural Austin, and maintain a flush transition to exterior threshold decks so indoor and outdoor spaces connect without trip hazards.
💡 Tip: Leave a 1/2-inch expansion gap around the entire perimeter hidden beneath your baseboards.
Subfloor Material Traffic Light Guide
- 🪵 Engineered Oak Planks — Stable multi-ply construction handles metal expansion.
- ⚠️ Laminate Flooring — Prone to edge swelling if moisture gets trapped.
- ❌ Solid Hardwood — Will warp severely over metal subfloors.
4. Built-In Birch Plywood Storage Bench
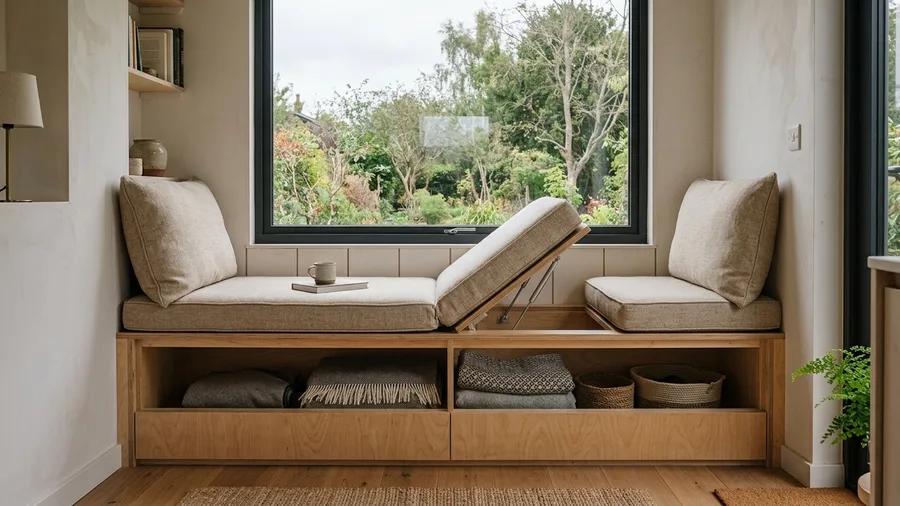
Tight footprints require every square inch of furniture to pull double duty as hidden storage instead of wasting valuable floor space.
Build a 6-foot window seat out of Baltic birch plywood right beneath the primary side window, adding lift-up hydraulic hinges for easy under-bench storage access without wrestling heavy lids.
Top the wood structure with a high-density foam cushion wrapped in textured linen to soften the hard lines and introduce a tactile textile layer.
⚠️ COMMON MISTAKE
Ignoring Ventilation Under Benches
Always drill 1-inch ventilation holes in internal plywood storage compartments to prevent stagnant moisture buildup against exterior metal walls.
5. Slatted Wood Room Divider Screen
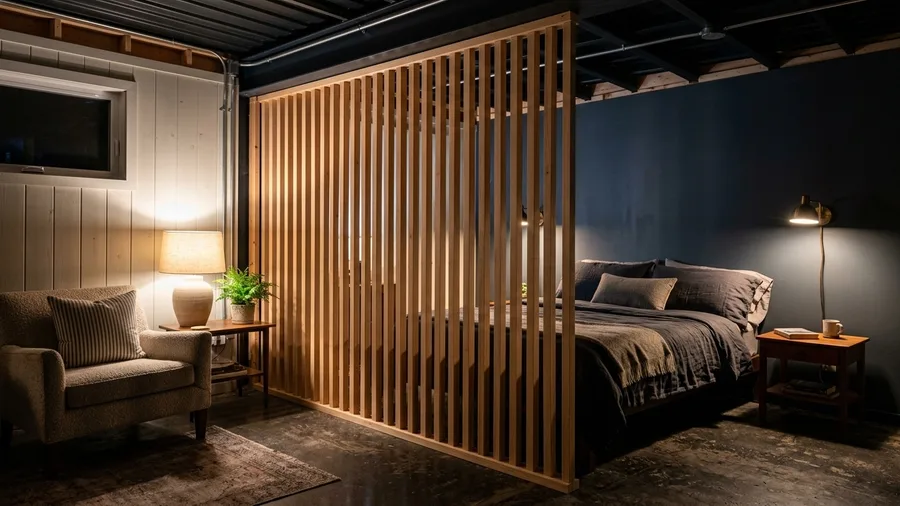
Borrowing from midcentury Japanese spatial design, this slatted partition creates distinct zones without stealing light or floor space.
Construct a semi-transparent screen using two-inch by two-inch hemlock posts spaced evenly across the width of the 320-square-foot footprint.
Anchor the vertical posts securely to top and bottom wooden tracks screwed directly into the interior framing studs for absolute rigidity.
Leave fifty percent open space between the vertical slats to let natural sunlight filter deep into the kitchen core while maintaining privacy for the bedroom zone.
Divider Screen Specs
6. Fluted Solid Wood Kitchen Island
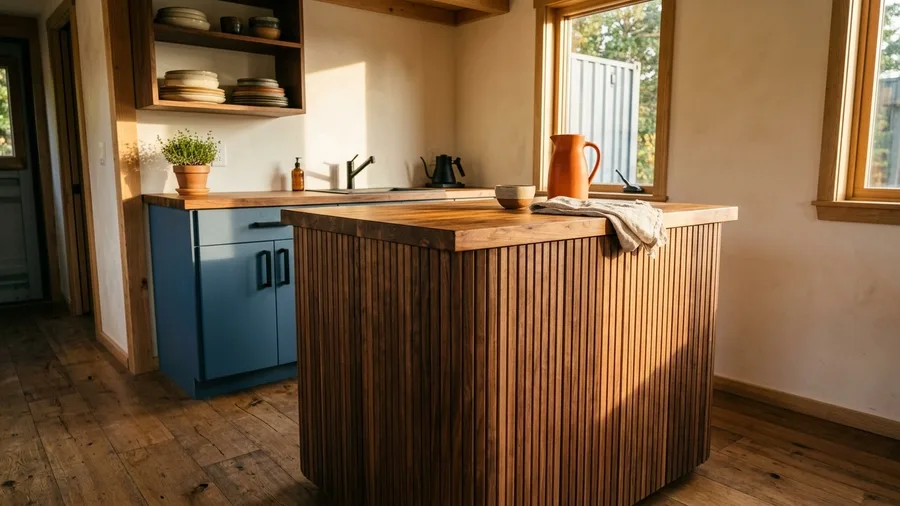
Standard metal food preparation stations leave compact cooking spaces feeling like commercial cafeterias instead of living areas.
Wrap the island base in walnut tambour panels to add tactile rhythm and rich organic texture.
Top the structure with a warm butcher block counter treated with food-safe mineral oil, catching the morning light that streams through the side window.
Pair the rich wood grain with matte black cabinet hardware to ground the entire cooking zone.
Kitchen Island — At a Glance
📐 Framing Clearance
36 inches
💧 Failure Mode
Water Pooling
🚫 Exception
Skip if wet zone
Threshold
Maintain 34-inch bar height clearance.
7. Upholstered Wood-Framed Window Nooks
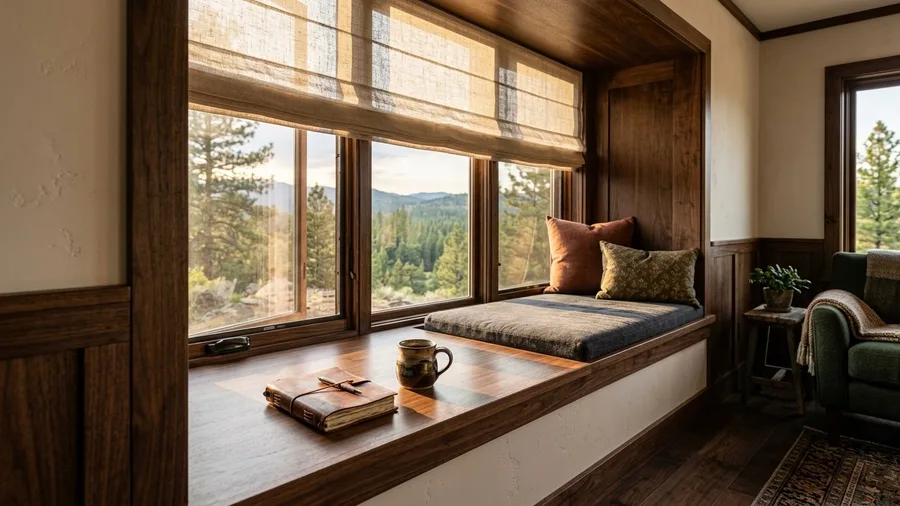
Sunlight pools across deep wooden sills instead of bouncing harshly off corrugated steel edges.
Deep corrugated steel window cutouts look raw and unfinished unless framed out with precision millwork.
Building a six-inch deep poplar window box surround bridges the gap between interior walls and glass.
Staining the trim to match your primary flooring tone creates seamless visual continuity across the compact thirty-foot layout.
Adding sheer linen Roman shades directly inside the wooden casing diffuses harsh afternoon glare while softening the steel architecture.
Window Framing Effort Spectrum
Measuring labor intensity across container window modifications
- Surface Poplar Box: Basic casing over existing factory metal frames.
- Custom Depth Sills: Requires precise scribe cuts for corrugated steel walls.
- Full Structural Header: Cutting new window apertures into structural steel.
8. Custom Walnut Floating Media Console
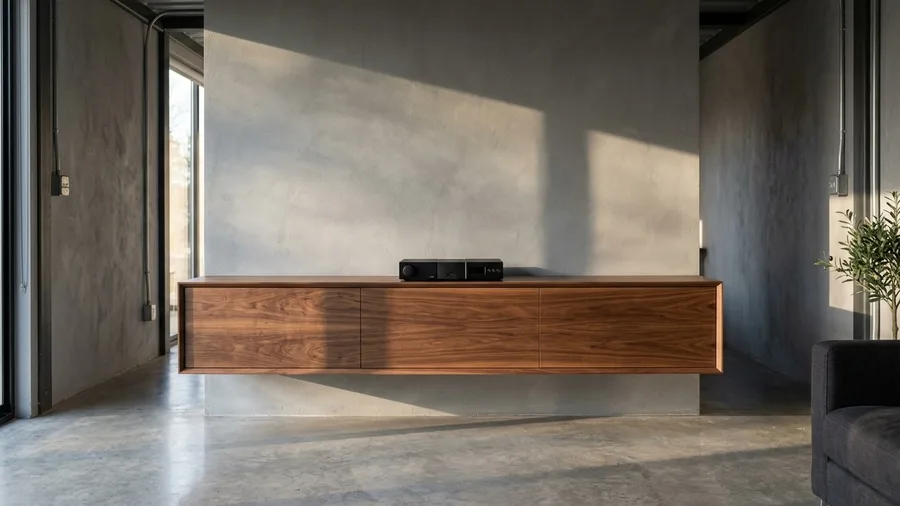
A slim, wall-hung media unit stops a narrow living area from feeling cramped and linear.
Mount an 8-foot floating walnut console 14 inches off the floor to keep the floor plane completely visible and bounce light across the room.
Route internal wire management channels through the back panel to keep cords hidden from view, and keep the overall depth to 12 inches to preserve necessary walkway clearance in the main room.
9. Exposed Laminated Timber Beam Accents
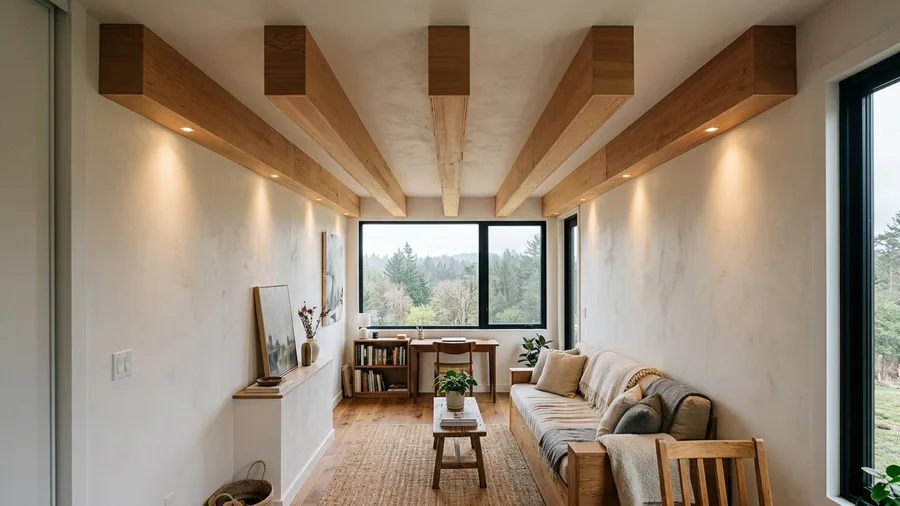
Adding heavy structural timber overhead exceeds the weight limit of a modified steel shipping container shell.
Fabricate hollow three-sided box beams from lightweight cedar plywood to mimic massive solid timbers while keeping the overhead load well under structural thresholds.
Space three evenly distributed box beams along the forty-foot length to establish clean architectural rhythm across the ceiling plane.
Conceal low-voltage recessed downlights directly inside the flat bottom faces of the beams to wash warm illumination down the interior walls.
10. Vertical Pine Tongue-and-Groove Accent Wall
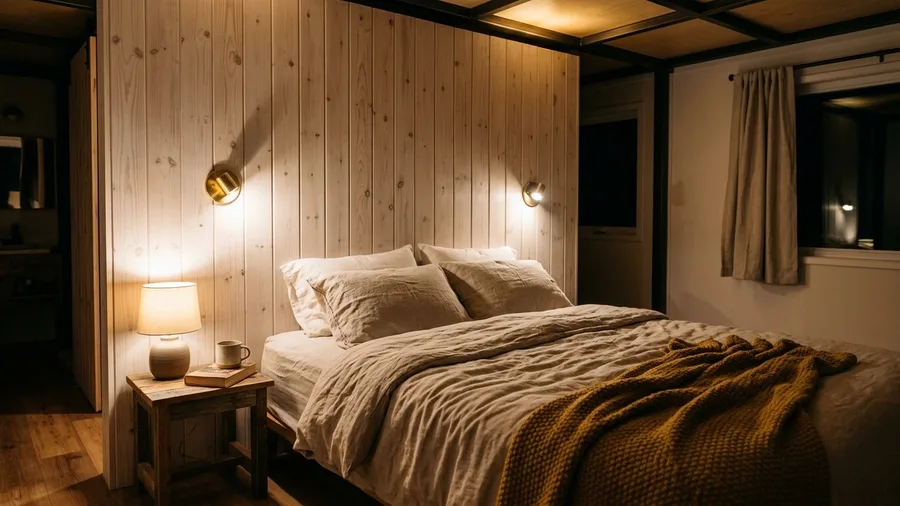
Sleeping areas need soft tactile surfaces that absorb sound and create an enveloping sanctuary feel.
Apply vertical 1×6 pine boards directly behind the headboard wall to draw the eye upward.
Apply a semi-transparent white wash finish to keep the compact sleeping quarters feeling bright and open.
Integrate flush reading sconces directly into the wooden boards for a clean, hotel-quality bedside setup.
11. Custom Plywood Pocket Bathroom Door
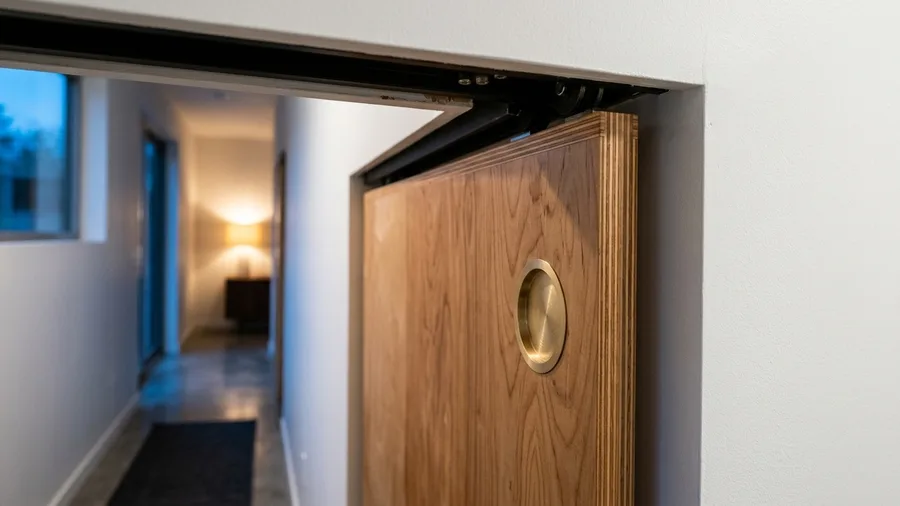
Swinging doors eat up precious floor space in narrow container hallways where every inch counts, unlike a sliding panel that tucks completely inside the wall cavity.
Building a custom frame utilizing a heavy-duty sliding track kit recessed into the ceiling framing keeps the entire mechanism smooth and entirely hidden from view.
The heavy track carries the weight effortlessly without sagging over time.
Use edge-banded three-quarter-inch birch plywood for maximum warp resistance in high-humidity bathroom zones, preventing the moisture from bowing the panel.
Finish with a recessed round flush pull in brushed brass to match adjacent cabinet hardware, keeping the passage completely clear of protruding knobs in the tight hallway.
12. Integrated Wooden Desk and Bookcase Niche
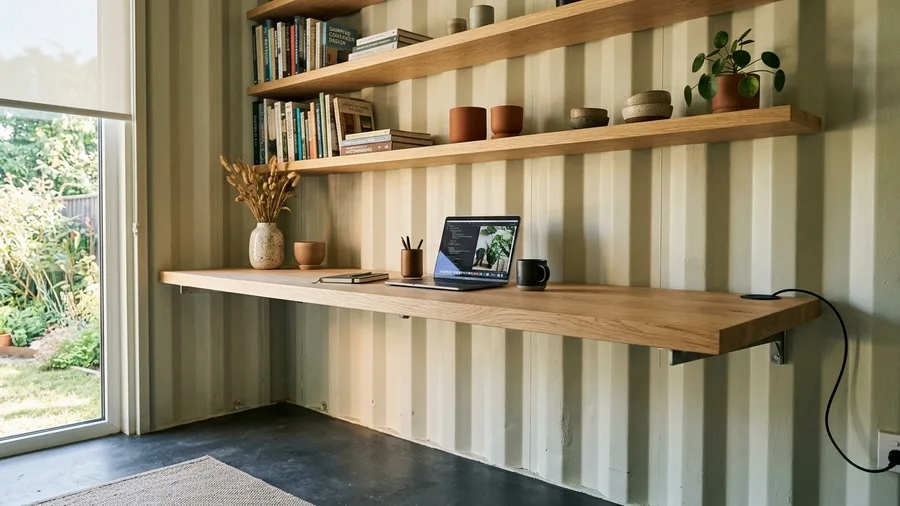
Most container home offices rely on bulky freestanding desks that crowd the narrow floor plan and disrupt the visual flow of the room.
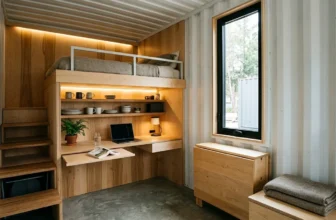
Construct a 5-foot floating oak desktop anchored firmly to interior wall framing studs to maintain an open footprint below.
Add open matching floating shelves directly above for reference books and curated ceramics.
Incorporate a rubber grommet in the desktop corner for clean laptop power cord routing and a clutter-free surface.
13. Slatted Wood Entryway Coat and Shoe Locker
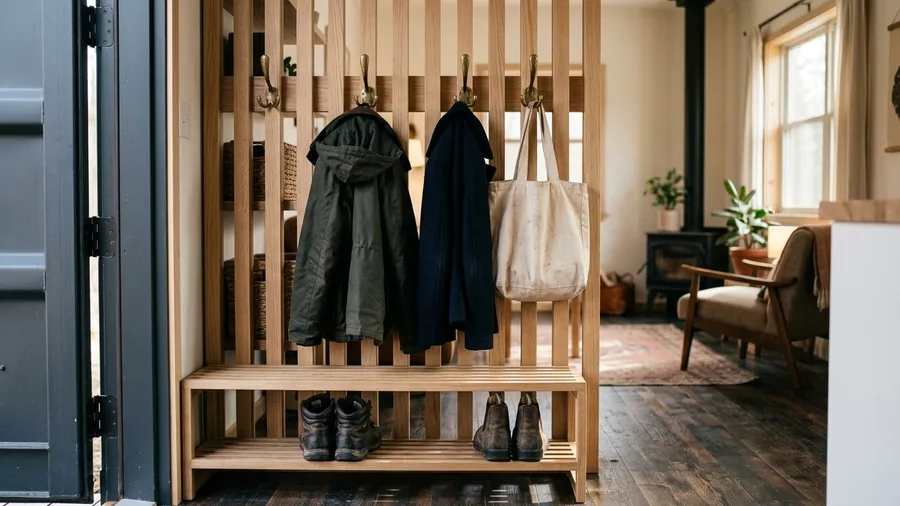
Tight spatial footprints at exterior entry thresholds often force clutter into main living zones where coats and boots pile up unmanaged.
Constructing a narrow timber partition directly inside the primary threshold establishes a dedicated drop zone without demanding a separate room enclosure.
Vertical white oak slats spaced two inches apart maintain visual sightlines while cleanly dividing the entry zone from the main living space inside the 320 square foot layout.
Mounted heavy brass double hooks anchor heavy winter coats and everyday canvas bags securely at comfortable reach heights for daily arrivals.
A slatted lower shelf allows wet footwear to drain freely without pooling water on the finished floor planks beneath.
14. Warm Timber Kitchen Open Shelving

Borrowing from classic utilitarian pantry layouts, open storage strips away heavy upper boxes to let light travel completely across the room.
Install two four-foot solid white oak shelves using concealed heavy-duty steel brackets anchored directly into the wall studs behind the corrugated steel frame.
Sand all front edges to a soft, rounded radius for an organic, tactile feel under hand, then style with matte ceramic dishware and amber glass jars to complement the natural wood grain.
15. Recessed Perimeter Wood Baseboards and Casing
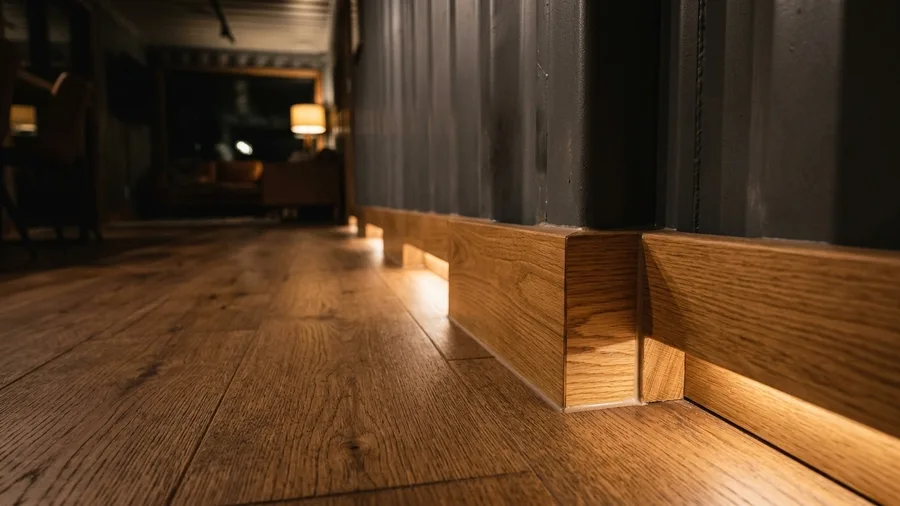
Every raw corner and sharp edge disappears behind clean lines once the final perimeter details are secured.
Corrugated steel shells create difficult transition gaps where walls meet floors across the home.
Install custom-milled 3-inch white oak baseboards to anchor the walls to the engineered flooring, while caulking all vertical perimeter joints before nailing trim in place to stop drafts and moisture leaks.
Match the exact wood stain finish across every room to guarantee complete visual continuity on a $12,000 total woodwork allocation.
Frequently Asked Questions
How do you insulate a shipping container home before adding wood paneling?
Install closed-cell spray foam directly against the interior steel walls for maximum R-value and moisture vapor barrier protection. Then, screw vertical wood furring strips through the foam into the steel ribs to create a solid nailing plane for your oak paneling.
Does wood paneling make a 40-foot container home feel too dark?
Not if you choose lighter timber species like white oak, birch, or white-washed pine. Pairing light wood tones with perimeter LED channel lighting and strategic mirrors bounces natural daylight throughout the narrow space.
How much does it cost to outfit a container home interior with wood?
A standard allocation for quality interior timber finishes, including white oak slats, cedar ceiling planks, and custom plywood built-ins, averages around $12,000 for a single 40-foot high-cube container.
Can wood flooring be installed directly over a steel container floor?
No. Steel subfloors are prone to condensation and temperature swings. Always install a sound-dampening acoustic underlayment and stable engineered hardwood planks to prevent warping.
Commit to Uninterrupted Timber Planes for True Warmth
Banishing industrial coldness from a shipping container home requires committing fully to uninterrupted timber planes and soft ambient lighting rather than relying on token wood accents.
Install your white oak panels, cedar ceilings, and custom built-ins with precise shadow gaps to create a cohesive, custom sanctuary.
Take your first step today by selecting your primary hardwood finish and testing stain samples directly on your framing lumber.