15+ Tiny Home Exteriors With Cedar Cladding That Ages Beautifully

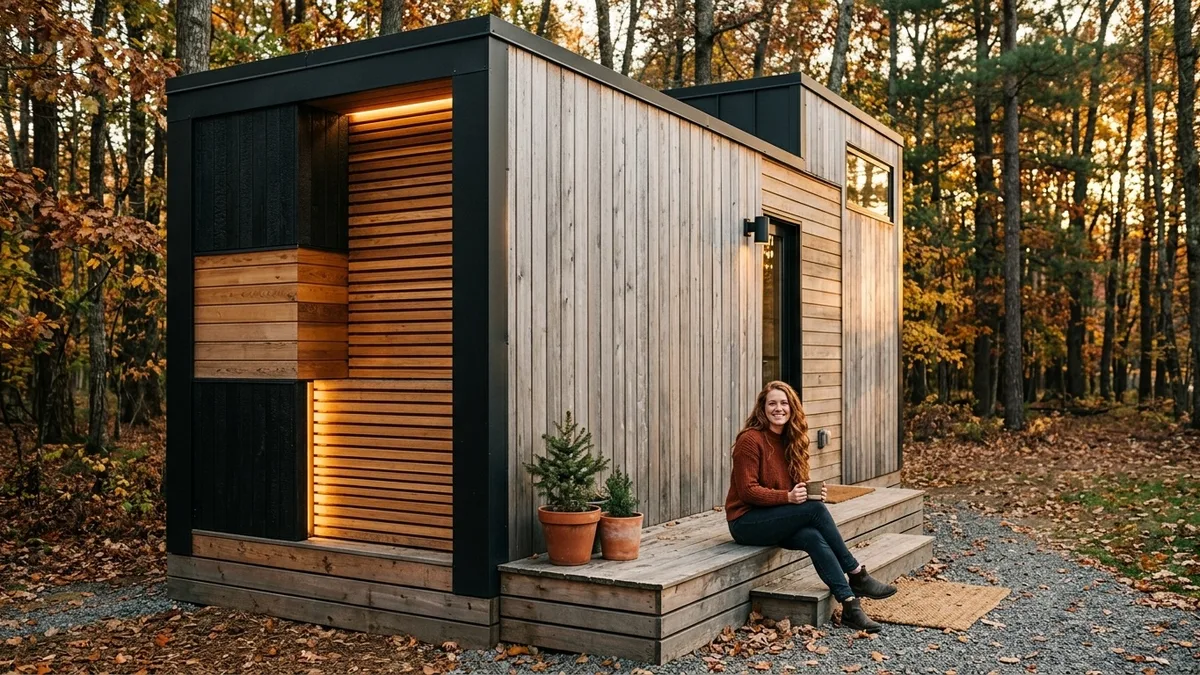
Every modern tiny home builder tries to freeze cedar in its bright golden youth, fighting a losing battle against the sun.
Driftwood silver is where the material finally hits its stride, offering a weathered finish that looks entirely at home in the landscape. Save these ideas if you want an exterior that actually improves with age.
Quick Tips Before You Start
Board Selection
Always specify clear vertical grain western red cedar to avoid warping and resin bleeding.
Fastener Rules
Use hot-dipped galvanized or high-grade stainless steel nails to prevent dark tannin stains.
Air Gaps
Leave a minimum three-quarter-inch drainage cavity behind the boards for proper drying.
1. Vertical Tongue and Groove Cedar Stays Sleek in Tight Alleys
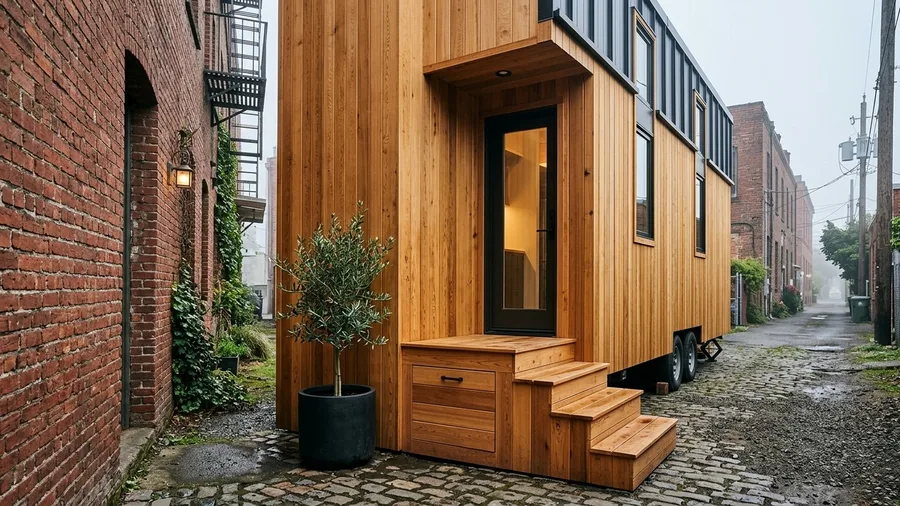
Running the clear western red cedar boards vertically draws the eye upward, making a narrow footprint feel taller while shedding rainwater quickly.
The hidden storage box integrated right into the front entry stairs keeps gear entirely out of sight, freeing up precious interior floor area.
Works best for urban backlot auxiliary dwellings requiring a clean, minimalist profile without protruding horizontal ledges.
💡 Tip: Seal the bottom end-grain cuts with an exterior-grade end sealer before mounting to stop ground moisture wicking.
At a Glance
2. Budget Horizontal Bevel Siding with Stainless Nail Details
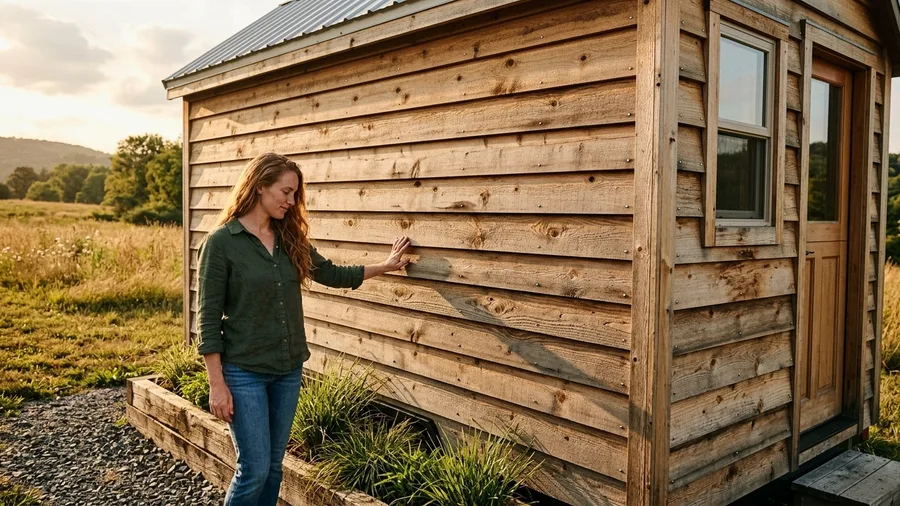
Horizontal cedar cladding has moved past uniform, expensive clear-grade lumber toward embracing raw knotty boards that keep material costs remarkably low.
Traditional bevel siding offers the classic high-end timber look at a fraction of the cost, provided you accept standard knotty grades instead of clear cedar.
Using affordable standard-grade cedar requires careful sorting during installation to discard cracked pieces, saving money while retaining rustic charm.
Works best for DIY weekend builders working under strict material budgets who want authentic wood character.
⚠️ COMMON MISTAKE
Skipping the Rainscreen Cavity
Nailing cedar boards directly to house wrap traps moisture against the back of the wood, causing premature rot and black staining within two seasons.
3. Charred Shou Sugi Ban Accent Panels Over Raw Cedar Base
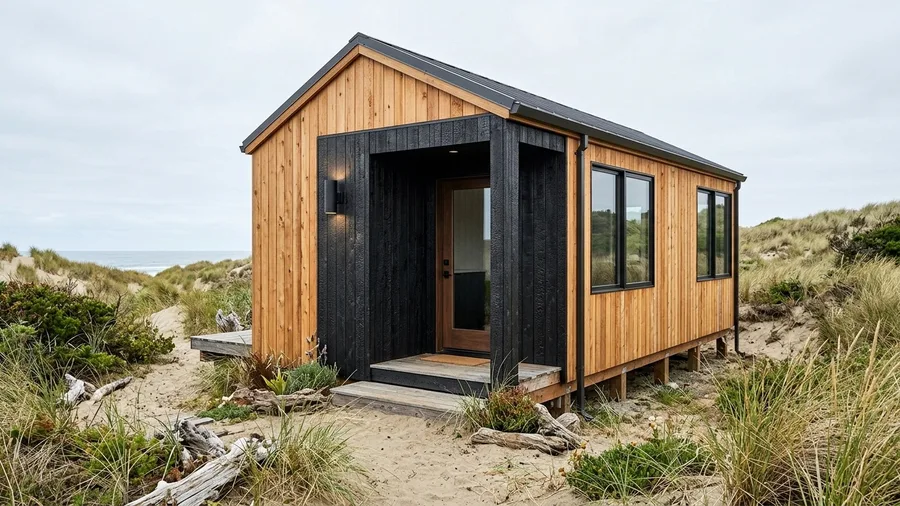
Charred shou sugi ban cedar goes deep black, and that permanent seal is the point.
Unfinished western red cedar requires constant mental math regarding weathering, making selective charring a deliberate design choice rather than a maintenance chore.
Pairing intensely black burnt cypress or cedar entry frames against the warm, honey-toned body creates dramatic contrast that stabilizes over decades.
Works best for exposed coastal sites where intense sun and salt air demand a pre-treated, durable facade element.
💡 Tip: Apply a coat of boiled linseed oil to charred panels annually to lock in the deep charcoal sheen.
Cladding Profile Comparison
📐 Profile
Tongue & Groove
💧 Drainage
Excellent
💰 Price Point
Mid-High
🔨 Install Ease
Moderate
Pro Choice
Choose tongue and groove profiles for maximum wind-driven rain resistance.
4. Wide Plank Western Red Cedar Boards in Natural Clear Finish
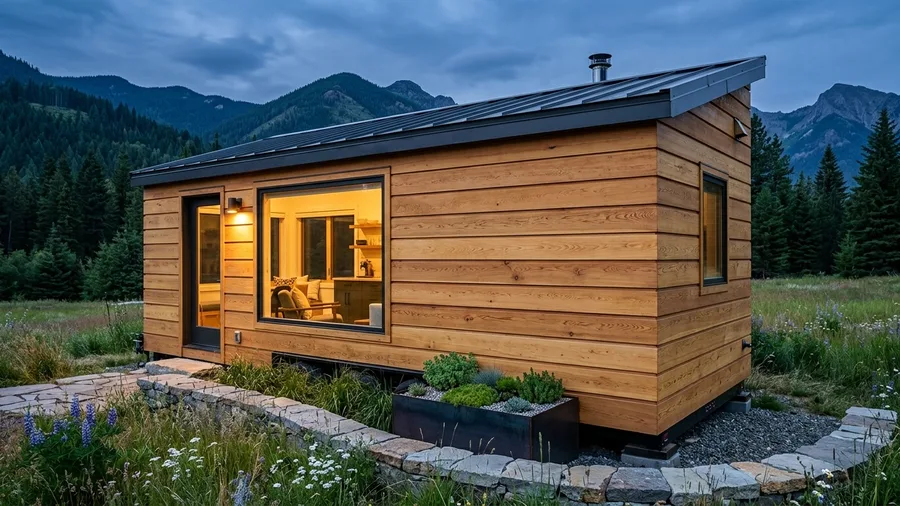
Think of this wide plank approach the way a custom tailor treats raw wool – the material does all the heavy lifting while simple lines keep it modern.
Installing eight-inch clear cedar planks with a slight reveal lets the natural wood grain breathe and expand without buckling the fasteners over seasonal temperature shifts.
Most tiny exteriors fail here because builders try to force narrow boards onto large surfaces, creating a busy, choppy texture that fights against the streamlined frame.
Instead, pairing these generous planks with a breathable UV-inhibiting penetrating oil preserves the golden honey undertones without forming a peel-prone plastic film on the surface.
Works best for wide, single-level micro foundations where horizontal lines stretch the visual proportions and anchor the structure gracefully to its site.
5. Board and Batten Cedar Layout on Compact Lofted Rooflines
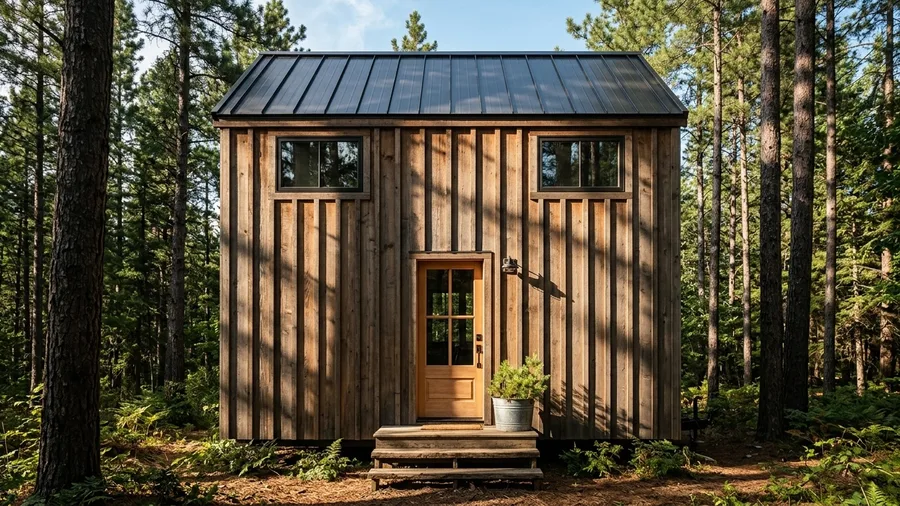
Do this one first if you only do one.
The layout here is entirely about rhythm and vertical scale, guiding the eye straight up to the standing seam metal roof.
Alternating wide cedar boards with narrow overlapping battens creates deep shadow lines that shift dramatically throughout the afternoon sun. Works best for tall, narrow lofted trailers that need architectural balancing to avoid looking boxy.
Before Mounting Cedar Siding
-
Install high-perm vapor permeable house wrap Prevents internal condensation while stopping bulk water.
-
Build vertical furring strip rainscreen grid Creates the mandatory drying air gap behind timber.
-
Sort boards by grain orientation and color tone Ensures an even, balanced visual distribution.
6. Rain-Screen Cedar Slats with Integrated Warm LED Backlighting
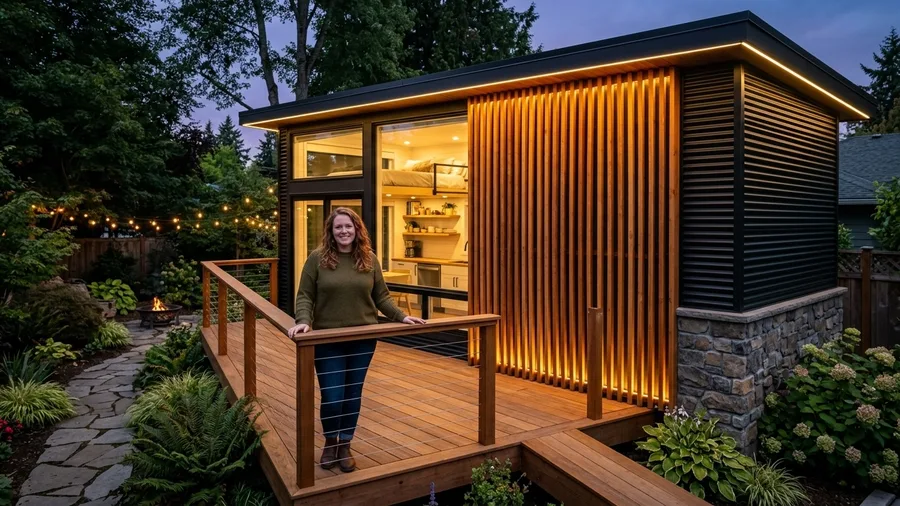
Seven in the evening arrives, and this slatted cedar wall becomes the primary light source for the entire outdoor deck area.
Spacing kiln-dried cedar slats half an inch apart over a dark waterproof backing membrane creates depth and hides exterior wiring channels.
A warm LED ribbon strip tucked directly behind the vertical channels casts a soft amber glow outward, washing the wood grain in deep, dramatic shadows.
Works best for contemporary backyard guest pods designed for evening entertaining and quiet relaxation.
💡 Tip: Use marine-grade black screws to fasten slats so the hardware disappears entirely into the shadow gaps.
7. Mixed Palette of Weathered Silver Cedar and Matte Olive Steel
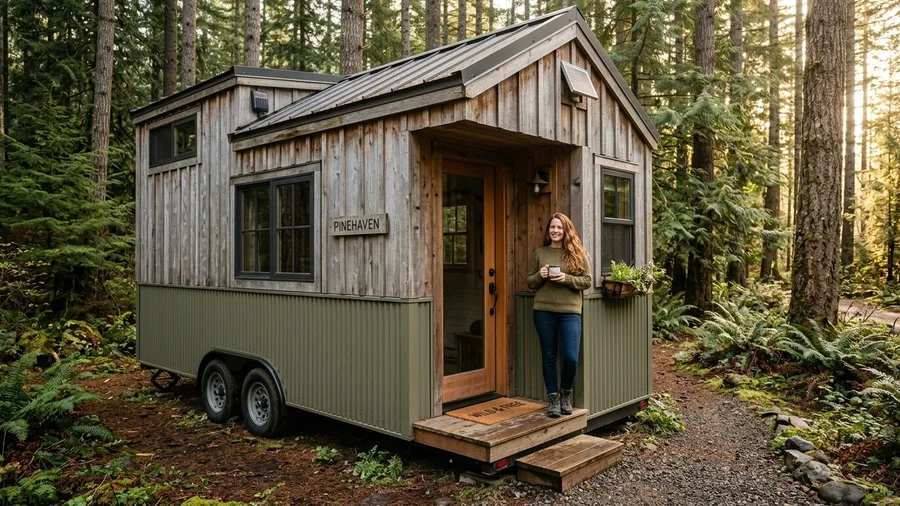
At seven in the morning this wall is the only warm thing in the house.
The palette relies on a precise triad: weathered silver cedar boards, matte olive corrugated metal panels, and charcoal window frames.
Transitioning from warm timber at the entry door to cool industrial steel along the wheel wells anchors the structure visually to its site.
Works best for rustic woodland settings where manufactured structures need to blend seamlessly with surrounding pine trees.
A careful matte seal applied twice a season preserves the exact balance of gray and green without adding unwanted synthetic shine.
8. Craftsman Style Cedar Shingles with Crisp White Corner Trim
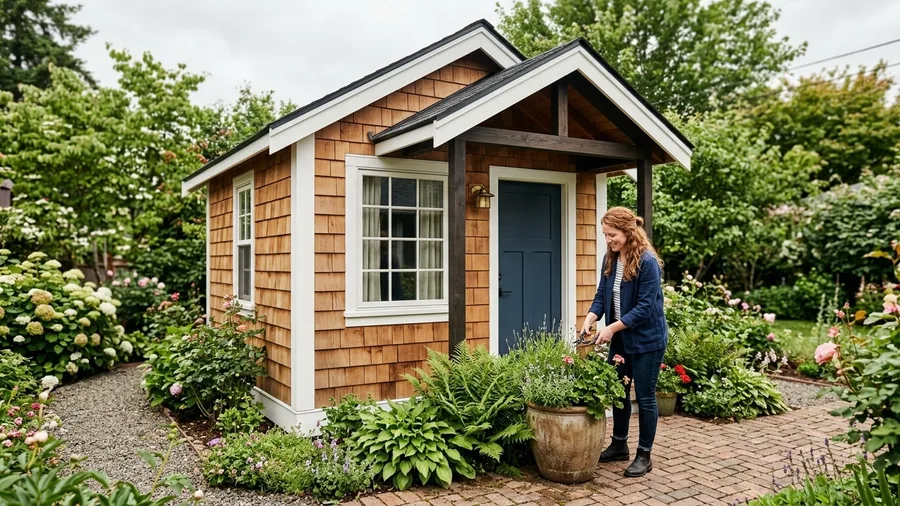
Most tiny home exteriors look jarring in traditional neighborhoods because they lean too hard into futuristic metal panels instead of borrowing local heritage cues.
Hand-dipped western red cedar shingles paired with thick, primed white corner boards offer a timeless cottage aesthetic that never looks dated.
The focal point relies on staggered cedar shingle courses grounded by crisp white trim, offset by a matte black door handle and a low-profile brass porch light.
Works best for permanent or semi-permanent garden cottages styled after traditional suburban homes.
9. Cantilevered Cedar Box Design for Small-Footprint Trailers
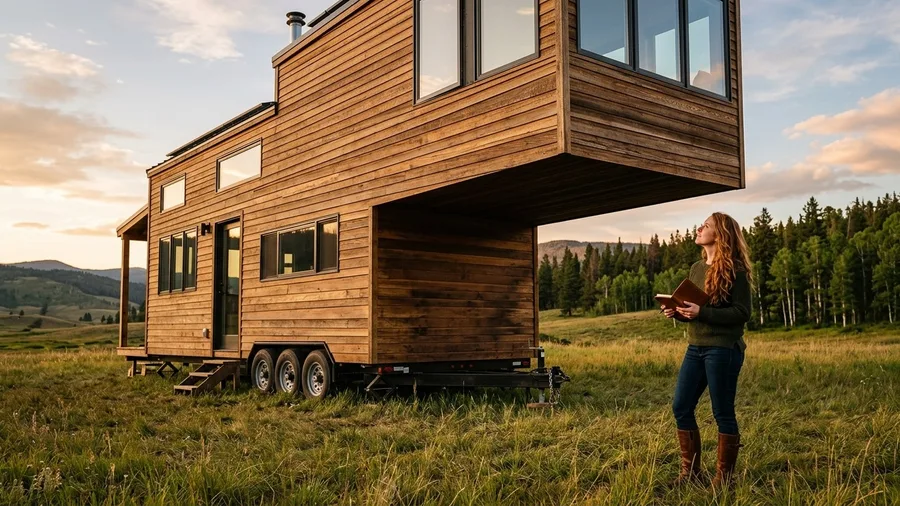
Think of this cantilevered trailer box the way you think of a diving board – the entire physics trick relies on a heavily reinforced anchor buried deep out of sight.
This cantilevered layout works entirely because of structural steel framing hidden beneath the floor joists, permitting an overhang that defies the tiny trailer base.
Wrapping the cantilevered upper floor in tight horizontal cedar siding creates a floating mass effect that tricks the eye regarding overall square footage.
Without that concealed steel backbone holding the weight, the wood grain and geometric lines would simply sag under their own mass during transport.
Works best for maximum interior loft space paired with a striking, gravity-defying modern exterior silhouette.
Best For Small Footprints
10. Mitered Corner Details on Seamless Cedar Siding Runs
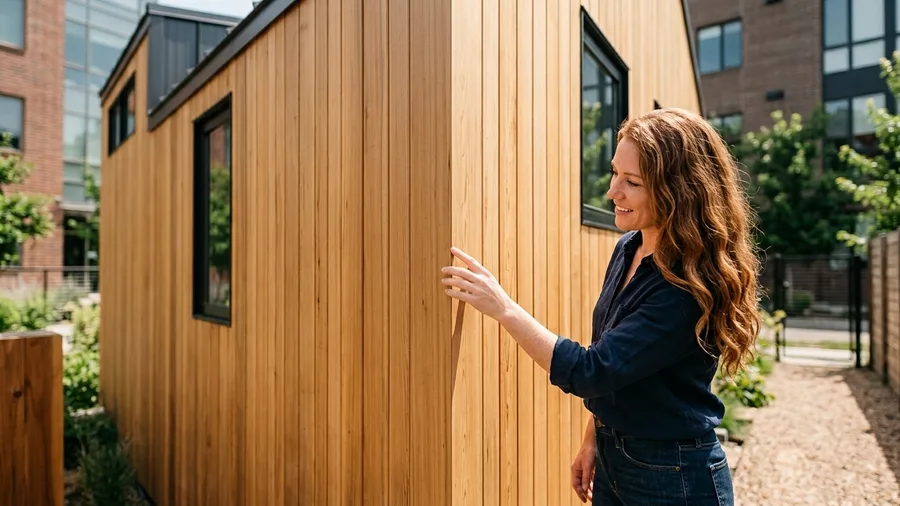
Most tiny home builders rely on cheap plastic corner channels to hide sloppy mistakes because custom cuts take too long.
The hidden catch is that those PVC pieces yellow under direct sun within two seasons, destroying the clean lines of natural wood.
Executing precise forty-five-degree cuts requires a sharp sliding compound miter saw and patient fitting, eliminating ugly plastic corner channels entirely.
This meticulous joinery works best for high-end bespoke tiny homes where craftsmanship is immediately visible upon close inspection.
💡 Tip: Apply exterior wood glue to miter joints during assembly to prevent them from opening up as the wood cycles through humidity.
11. Balancing Cedar, Glass, and Steel Surfaces
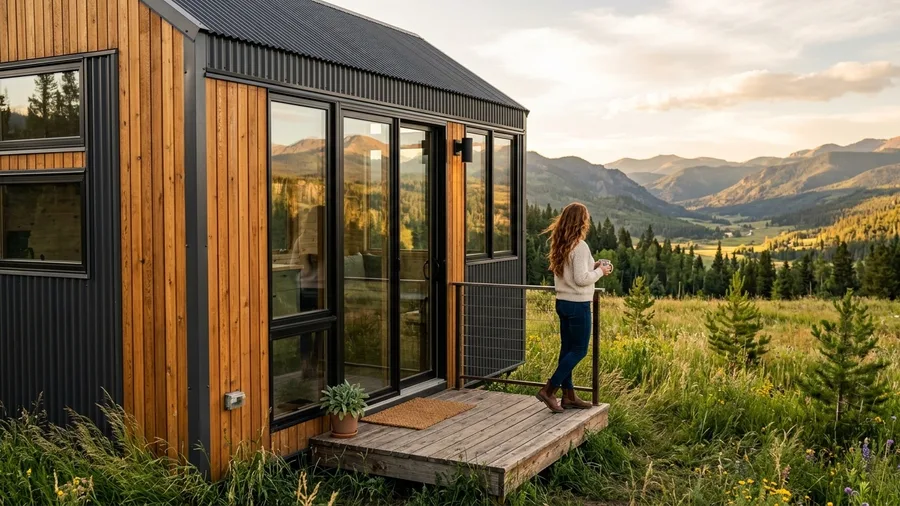
Exterior design has moved past single-material siding – here is what people are actually doing now.
Balancing three distinct architectural surfaces requires strict proportions: warm western red cedar for the body, expansive glass for the entry, and dark steel for the roof. The juxtaposition of organic wood grain against cold architectural glass and crisp metal ribs creates an immediate sense of custom architecture.
Works best for scenic rural plots where massive windows frame outdoor views while wood grounds the structure.
Weathering Aging Spectrum
From fresh install to mature patina
- Fresh Cut Honey Gold: Initial state right after installation with natural golden oils.
- Amber Warmth: First season exposure deepens the natural reddish undertones.
- Muted Slate Gray: UV breakdown stabilizes wood pigments into silver driftwood tones.
- Full Silver Patina: Complete natural weathering with zero maintenance required.
12. Oversized Cedar Pivot Door as the Main Exterior Anchor
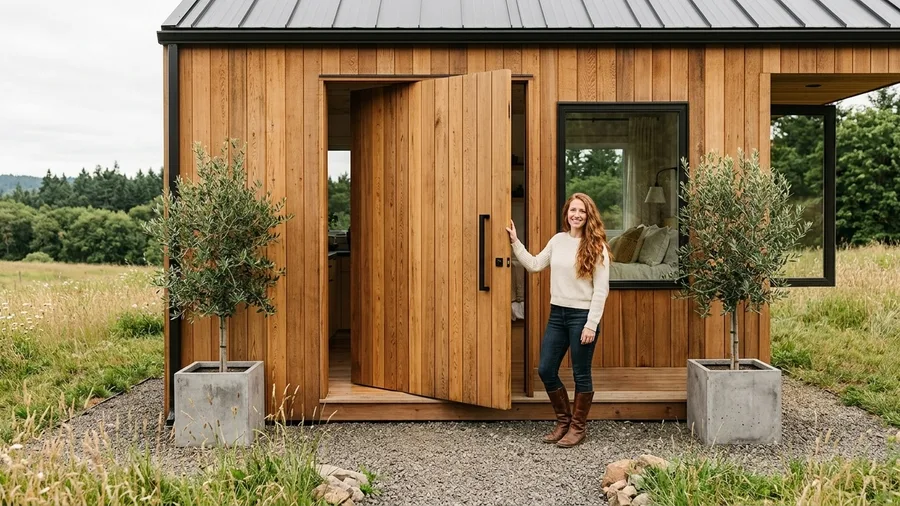
Rich western red cedar grain takes on a silvery patina over time, and that natural weathering is the whole point of a grand entryway.
Think of this custom pivot door the way you think of a primary artwork in a gallery – everything else on the facade serves to frame it.
Crafting a floor-to-ceiling solid cedar pivot door out of vertical planks establishes an immediate sense of scale and luxury on a compact tiny footprint.
Works best for modern minimalist builds where a single high-impact architectural feature replaces fussy decoration.
13. Aged Driftwood Gray Cedar on Shaded Forest Retreats
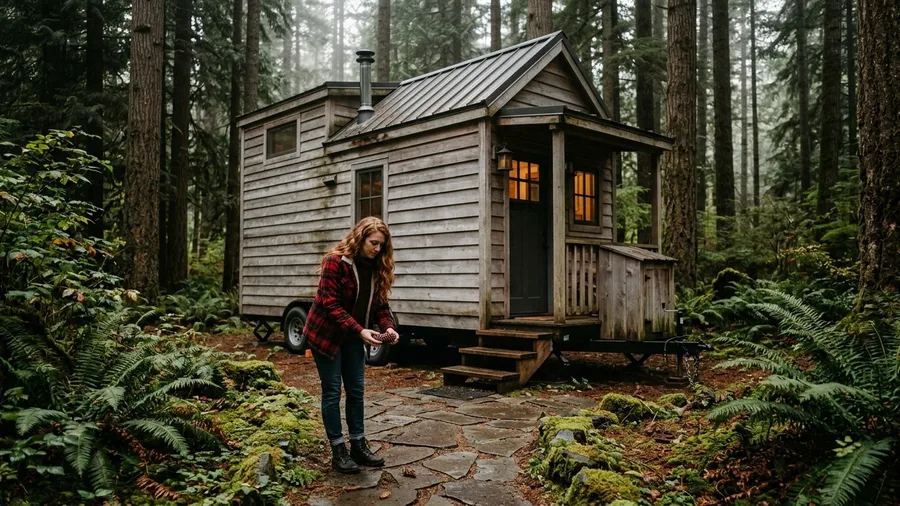
Zero hours of annual oiling make this weathered cedar approach a favorite for remote woodland retreats.
Most builders spend weeks trying to preserve original orange wood tones, but letting cedar weather naturally into soft driftwood gray is far more harmonious with a dark canopy.
Allowing the wood to grey out eliminates the annual pressure of stripping and re-oiling hard-to-reach loft walls on mobile trailers.
Skipping the chemical sealants also saves roughly four hundred dollars in specialty finishes every single season while letting the facade breathe naturally.
Works best for heavily wooded forest plots where maintenance access is difficult and natural blending is paramount, though anyone impatient for a uniform silver patina should skip it.
💡 Tip: Wash the gray surface once a year with a gentle oxygen bleach solution to remove accumulated organic mold spores.
Cedar Exterior Priority Hierarchy
What matters most for longevity
14. Horizontal Cedar Siding Paired with Dark Metal Flashing Details
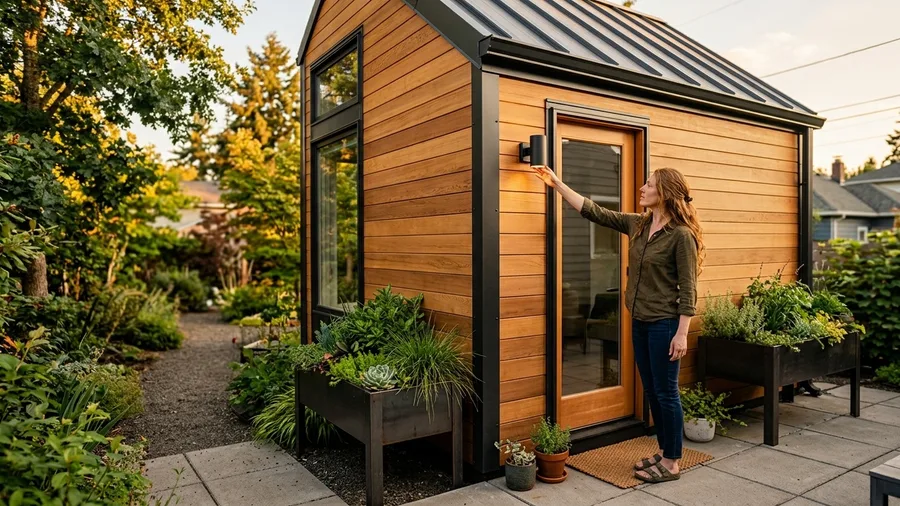
Razor-sharp black metal drip edges anchor the entire exterior design.
The palette balances organic cedar boards against razor-sharp black metal drip edges and custom window flashing profiles, creating a crisp contrast that defines the modern architectural silhouette.
Running horizontal cedar boards with crisp metal breaks protects vulnerable end-grains from pooling rainwater while creating clean modern lines, solving the hidden moisture retention issues common in tight wood siding applications.
Works best for contemporary backyard offices and auxiliary dwelling units requiring sharp, professional detailing.
15. Diagonal Cedar Siding Accent Wall Framing the Front Porch
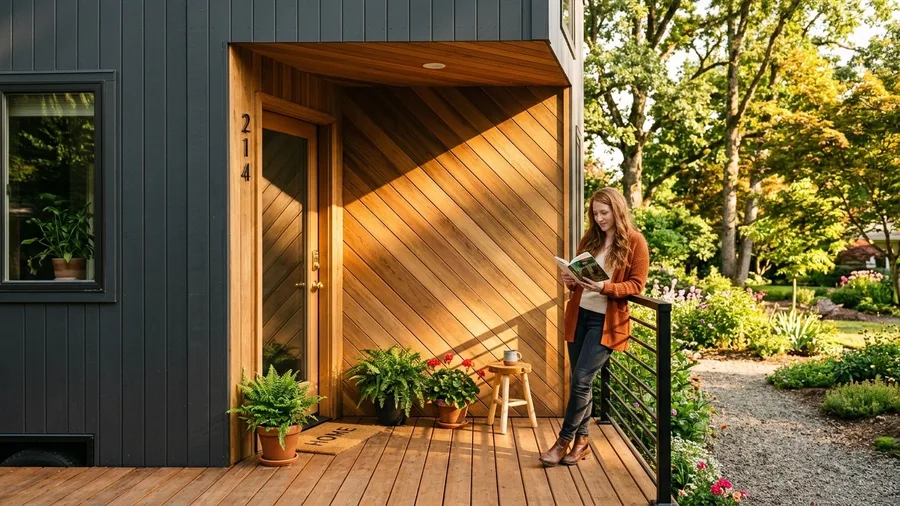
At four in the afternoon, diagonal cedar boards catch low-angle sunlight, casting dynamic shadows across the recessed front deck.
Switching the siding orientation to a forty-five-degree angle inside the porch recess instantly defines the entry zone without adding physical walls.
Works best for compact builds looking to break up monotonous exterior expanses with a single dynamic geometric feature.
💡 Tip: Double-check your stud layout before cutting diagonal boards to ensure every end lands securely on solid framing.
Frequently Asked Questions
Do I need to stain cedar siding or can I let it age naturally?
You can let cedar age naturally into a silver-gray patina without applying any finishes. However, using a UV-inhibiting penetrating oil during the first year helps control the rate of color change and prevents uneven sun bleaching across shaded and exposed walls.
What type of fasteners should I use with cedar cladding?
Always use hot-dipped galvanized or high-grade stainless steel nails and screws. Standard steel fasteners react with natural wood tannins, creating unsightly black stains around every nail head when exposed to moisture.
Why is a rainscreen air gap necessary behind cedar boards?
An air gap allows moisture that penetrates the wood or condenses behind it to drain downward and evaporate freely. Without this gap, trapped moisture causes premature rot, cupping, and mold growth.
How often does cedar siding require maintenance?
If left to weather naturally, cedar requires very little maintenance beyond annual washing to remove dirt and organic debris. If you choose to maintain a pigmented stain or oil finish, expect to reapply coats every two to four years depending on sun exposure.
Why I Start Every Tiny Exterior Design With the Rainscreen First
If you build only one thing right on your tiny home exterior, make it the drainage cavity behind your cedar cladding. Getting the framing furring strips and fasteners right ensures the timber stays dry, stable, and beautiful for decades.
Save these ideas, measure your trailer framing carefully, and choose the siding profile that matches your local climate before cutting your first board.
Ready to Plan Your Cedar Cladding?
Review our quick reference guide above to check your fastener types and air gap dimensions before you start building.