Best Hikes in the USA To Do Before you Die

My dad carried me into my first national park in a backpacking frame before I could walk. Every summer after that, the White Mountains were my backyard — and somewhere between those childhood ridgelines and the last decade of hunting down America’s most rewarding trails, I built a list I am genuinely proud of.
This country has more hiking variety than anywhere else on earth. Glaciers in Alaska, red-rock canyons in Utah, sea cliffs in Hawaii, granite peaks in the Rockies — the only real problem is choosing where to start.
So here are 19 trails I think every hiker should do before they die. Some are day hikes. Some are multi-week through-hikes. All of them have changed how I think about what this country looks like from the inside.
The specifics below — distances, permits, what to bring, where I went wrong — are here so you can start planning the one that fits you right now.
Quick Tips Before You Start
Book Permits Early
At least half the trails on this list require advance permits that sell out months ahead — check Recreation.gov and each park's official site the moment you pick a trail.
Carry a Bear Canister
Required for overnight camping on the JMT, Longs Peak, and most Sierra Nevada routes — arriving without one means you cannot legally camp.
Start Alpine Routes at Dawn
Afternoon lightning is the biggest danger above treeline; plan to be below 12,000 ft by early afternoon on any Colorado or Sierra summit day.
Filter, Don't Carry
A Sawyer Squeeze or BeFree filter saves pounds on multi-day routes where water sources are frequent — but always verify sources on current trip reports before you go.
Target Under 30 lbs Base Weight
Anything heavier compounds knee strain on high-elevation days and is the single most common regret on a first long route.
1. Clouds Rest–Half Dome–Vernal Falls Loop, Yosemite
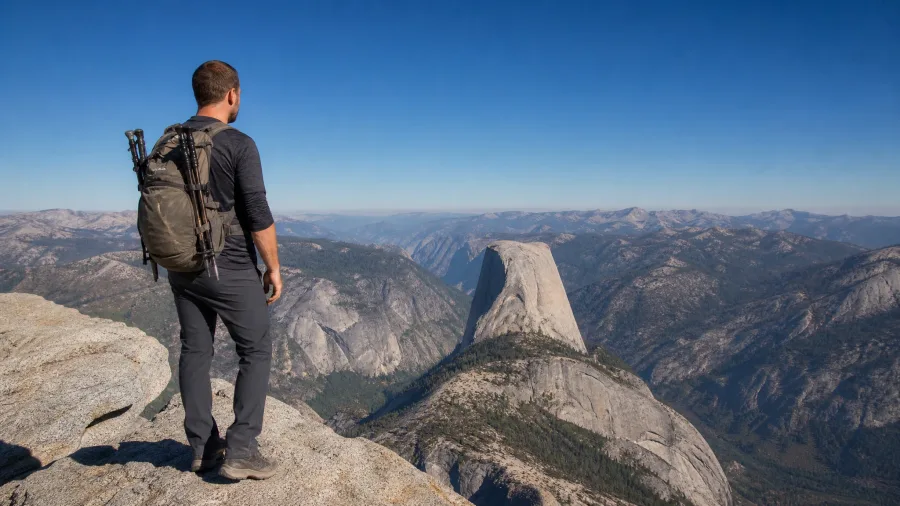
This 30-plus-mile Yosemite loop is the route I did last year, and it earns every superlative thrown at it – nearly 10,000 ft of elevation gain linking three of the park’s greatest landmarks in a single trip.
You can start and end in Yosemite Valley on the Mist Trail, or begin at the Sunrise Lakes Trailhead near Tuolumne Meadows for a longer, less crowded approach. I always take the Tuolumne start: the early miles warm your legs up gradually and the crowds thin out before the real climbing begins. The two options can also be stitched into a one-way trip finishing in the Valley if logistics allow.
Standing in the spray below the waterfalls on the Mist Trail is one thing. Looking down on Half Dome from the Clouds Rest summit – where the dome sits below you like a knob on a relief map – is something else entirely. That view alone is why this route beats a straight Half Dome day hike every single time.
You need two separate permits: a backcountry camping permit for any overnight stay in Yosemite, and a Half Dome cables permit, available late May through mid-October only. Both are competitive. Treat the permit applications as the first step of planning, not the last – trying to sort them six weeks out is how people miss this trip entirely.
💡 Tip: Apply for the Half Dome cables permit lottery in March for the main season — pre-season dates in late May often have slightly better odds.
2. John Muir Trail, Sierra Nevada
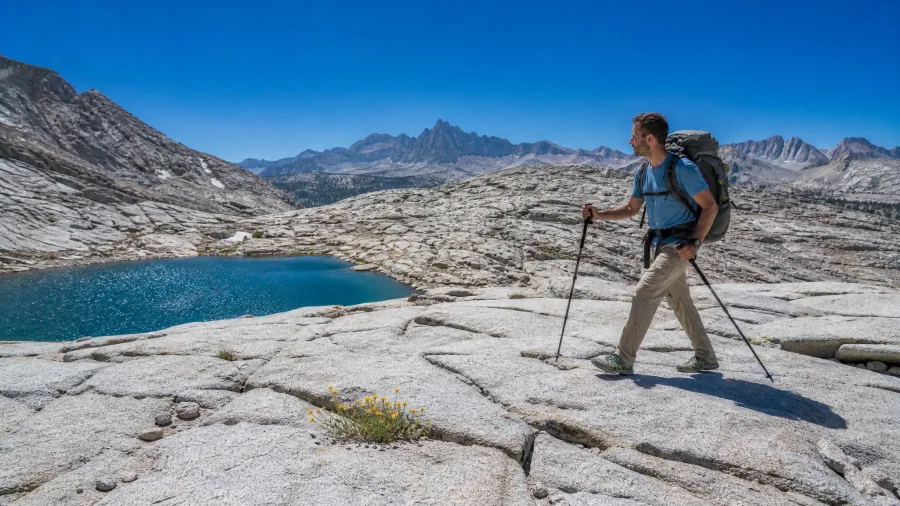
That is the John Muir Trail – Yosemite Valley to the summit of Mount Whitney, the highest peak in the lower 48, running through Kings Canyon and Sequoia National Parks the whole way. Three weeks end-to-end, and the range does not waste a single mile on dull scenery: glittering alpine lakes near Mammoth, jagged granite walls, wildflower meadows that stop you mid-stride.
The permit system is as competitive as the terrain is spectacular, so build the application process into your timeline the same way you would flights and resupply boxes. Can’t carve out three consecutive weeks? The Yosemite Valley to Tuolumne Meadows section delivers the trail’s full character in a fraction of the time.
3. Avalanche Lake Trail, Glacier National Park
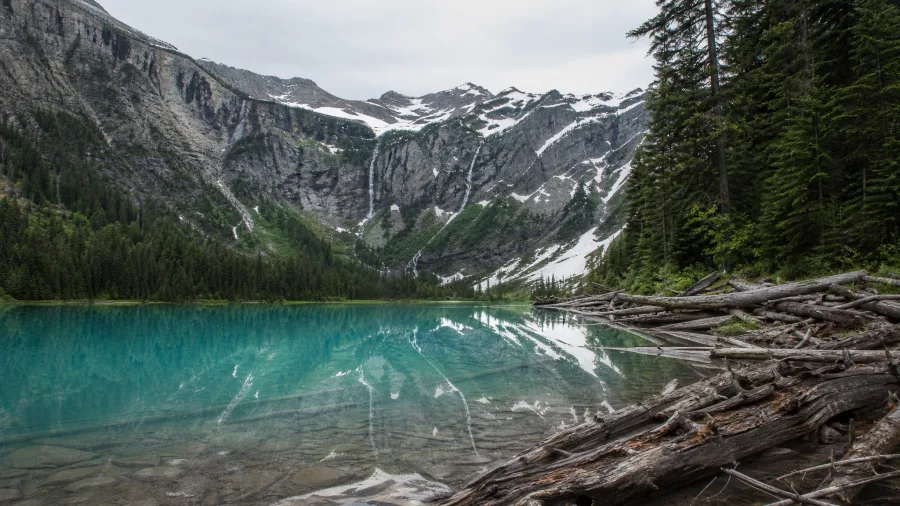
That Sierra scale can feel intimidating, which is exactly why Avalanche Lake deserves a spot on the same list.
It is a nearly 6-mile out-and-back from Going-to-the-Sun Road, crossing the Avalanche Gorge footbridge and winding through old-growth forest alongside Avalanche Creek before opening onto a hypnotically blue lake in the shadow of Bear Hat Mountain. Hundreds of avalanche-felled trees mark where the creek meets Hidden Creek – the kind of raw, visible geology you do not forget. The moderate difficulty makes this one of the most genuinely realistic entries here for a wide range of fitness levels.
Glacier is one of the most scenically concentrated parks in the lower 48, so leave time after the hike to drive more of Going-to-the-Sun Road before heading out. It would be a real waste to leave early.
⚠️ COMMON MISTAKE
Do Not Underestimate Permit Complexity
Several trails here — Yosemite backcountry, JMT, Half Dome cables, Havasupai, Kalalau — require permits that sell out months in advance. Check each trail's official park or state website for current release dates, and never assume availability is open until you have confirmed it.
4. Lostton Glacier Trail, Alaska
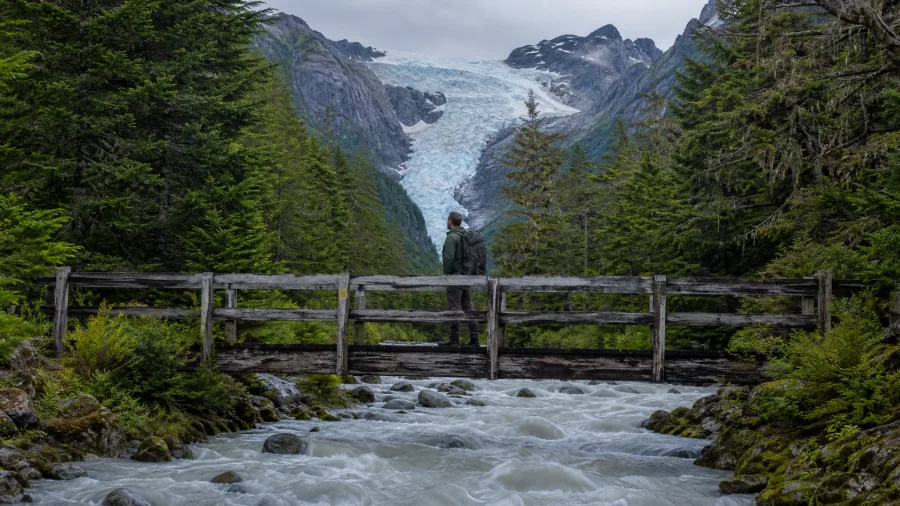
The Avalanche Lake approach made the case that how you get somewhere matters as much as what you find there – but the Lostton Glacier trail in Alaska takes that idea somewhere else entirely.
I did this hike in 2023. You ride a train through the Yukon, get dropped at a wilderness trailhead, and watch the train pull away through the trees until it disappears completely. That moment – standing there with your pack, the engine sound fading to nothing – is the sharpest memory I have from the whole trip, and you haven’t taken a step yet.
The trail itself is 4.4 miles: wooden bridges crossing glacier-fed Lostton Creek, a strange stillness that sets in around mile two, and a rustic cabin waiting at the end. Walk out onto the moraine and you get glacial ice tumbling through rocky peaks in every direction. The optional dip in the glacial pools is exactly as cold as it sounds, and I’d do it again without hesitation.
Plan the train logistics as carefully as you plan the hike. This is not a trailhead you can drive to on a whim – the train is the only way in, and the schedule runs it.
💡 Tip: Plan the train logistics as carefully as the hike itself — timetables are limited and the drop-off point is not a standard station stop.
5. Cascade Pass to Sahale Glacier, North Cascades
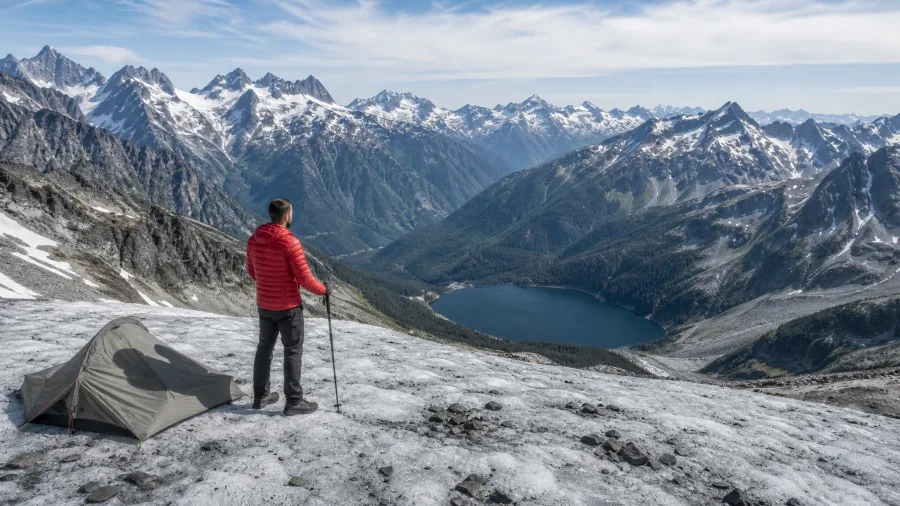
Once you have stood on an Alaskan moraine staring up at a glacier, you start wanting that feeling at altitude – and the Sahale Glacier in Washington’s North Cascades is exactly where to find it.
This two-day, nearly 12-mile route runs from the Cascade Pass Trailhead through Basin Creek Camp and up to Sahale Arm, where the glacier shimmers down toward Doubtful Lake far below. Mountain goats appear at the higher elevations like they own the place, and camping on the glacier itself gives you some of the best tent views in the contiguous US. Grab the permit at the Cascade National Park Backcountry office before setting out – or commit to a very early start and do it as a long day hike. Either way, if the Pacific Northwest is reachable, this one goes to the top of the list.
6. Big Pine Lakes Trail, Eastern Sierra
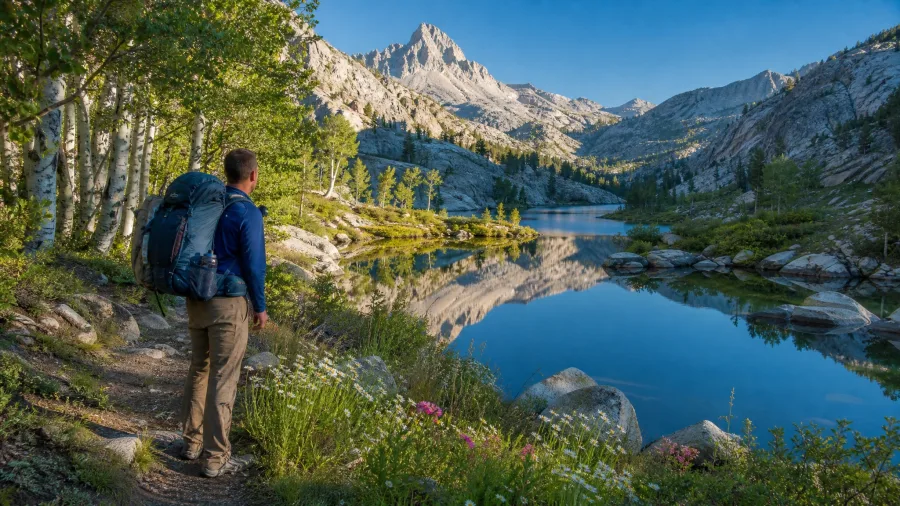
Unlike the Sahale route, which locks you into one very specific objective, Big Pine Lakes lets you choose your own level of suffering – and that flexibility is exactly why I keep sending people there.
The North Fork Big Pine Creek Trail runs 15 miles in full with around 9,000 ft of total elevation gain, starting at a historic cabin and climbing through mountain meadows before the lakes begin appearing one by one at increasing altitudes. Waterfalls cross the path, aspen groves flicker in the wind, and wildflowers line the trail through summer – the scenery earns its keep at every stage, not just at the top.
Lake 2 is the turn-around point I recommend for a day hike. It is manageable, the views are already genuinely impressive, and you are back at the trailhead before your legs fully register the altitude.
The overnight option is the one I keep pushing, though. Get a backcountry permit in advance for the John Muir Wilderness, camp beside one of the higher lakes, and wake up to a Sierra Nevada sunrise that honestly rivals anything I have seen in Yosemite. The eastern Sierra draws far less foot traffic than the park’s main corridors, so the solitude here is real – and the scenery gives nothing away.
7. Beehive Trail, Acadia National Park
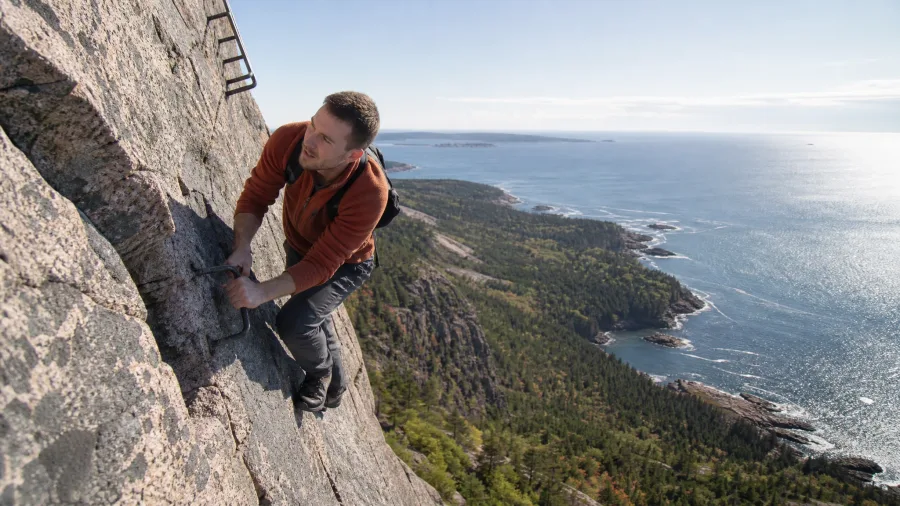
You are standing at the Beehive trailhead, you have read the sign, and the 1.5-mile distance makes you wonder if this was worth the parking fee. It was.
The trail involves iron rungs bolted into granite, ladder sections, steep stair climbing, and sheer drop-offs with no guardrails – this is a genuine scramble with real exposure, and it is not suitable for pets or young children no matter what the mileage suggests. Start at Sand Beach so you have somewhere to decompress on the way back, and loop through Bull Pond and the cliff ring to close the circuit properly.
From the summit knob, Acadia’s cliff faces and the Atlantic stretch out in front of you in a way that competes with trails ten times the distance. Mileage does not determine impact – the Beehive proves that every time.
8. False Kiva, Canyonlands National Park
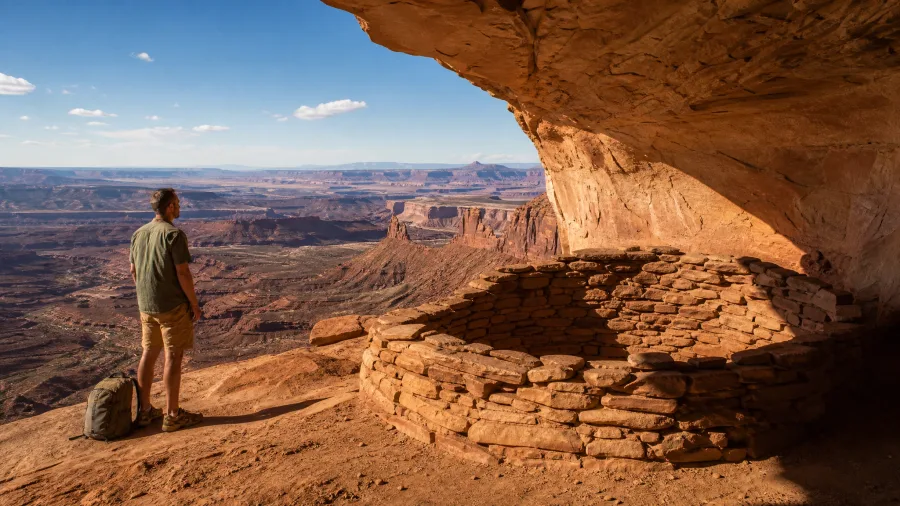
Where the Beehive puts you on a clearly marked trail with iron rungs someone installed for you, the False Kiva asks you to find it yourself – and that difference is the whole experience.
There are no official maps. Look for a fence-like row of juniper logs marking the trailhead, and talk to a park ranger before you set out, because access guidance can change without warning. The trail moves through red-rock desert past canyons and rock towers, drops you onto a canyon-rim rock shelf, and ends with a short sandstone scramble up to a ring-shaped Puebloan kiva sitting in a sheltered alcove with wide canyon views below.
The kiva itself is closed to visitors – observe from nearby and treat it with the same care you would give any active heritage site. This is a hike for patient, independent navigators, and the reward is one of the most quietly powerful places on this entire list.
Day Hike vs. Overnight: Which One Fits You?
Day Hike
- No permit logistics for most routes
- No gear weight or sleep quality concerns
- Avalanche Lake, Beehive, and Double O Arch are ideal
- Easier to bail if weather turns or you're underprepared
- Great for testing new boots or a new trail area
Overnight / Multi-Day
- Permits required on most routes — plan months ahead
- Bear canister mandatory on Sierra Nevada and Longs Peak routes
- Pack weight under 30 lbs or expect compounding fatigue
- Weather window matters: check forecasts the week before
- Unlocks routes like JMT, Teton Crest, and Lost Coast entirely
9. Cloudland Canyon West Rim and Waterfall Loop, Georgia
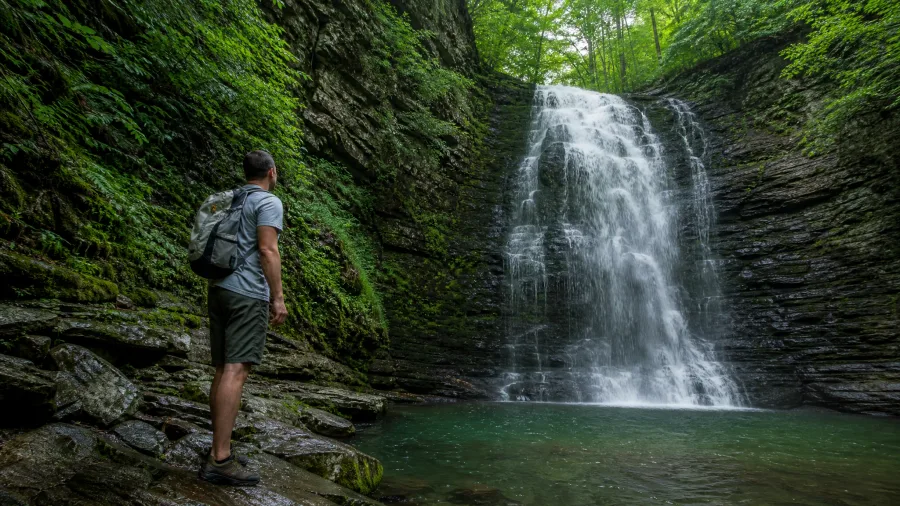
Cloudland Canyon State Park in Georgia does not get the attention it deserves, and I will never understand why.
Combine the West Rim Loop with the Waterfall Trail and you get forest walking, mountain overlooks above a gorge that drops more than 1,000 ft, and two of Georgia’s finest waterfalls – Hemlock Falls and Cherokee Falls – in a single trip. It is moderately challenging with consistent ups and downs, and in summer you can swim in the pools below the falls.
The logistics are unusually easy: cabins, glamping huts, and tent camping are all available inside the state park, so a full weekend here needs no backcountry permit and no expensive gear haul. For anyone in the South, this one belongs on the list.
10. Kings Peak via Henry Fork Trail, Utah
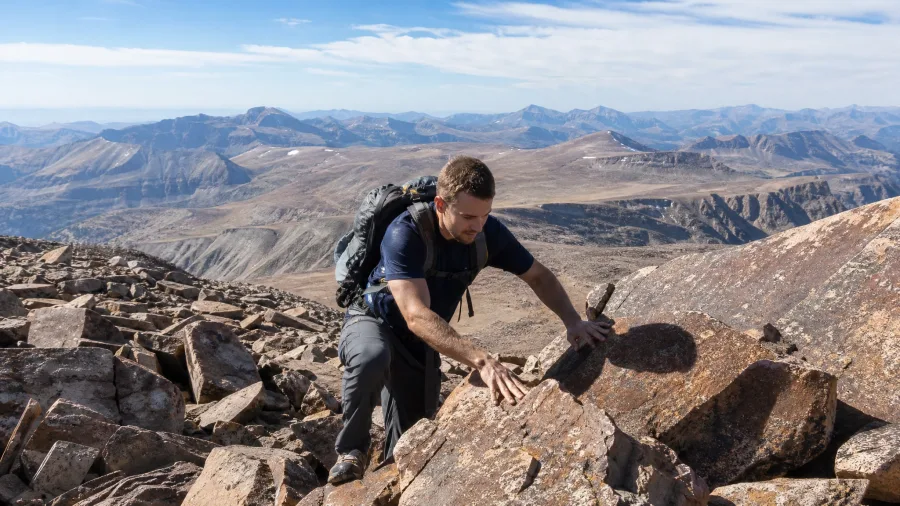
The Henry Fork Trail in Uinta-Wasatch National Forest covers 25 miles out and back to the summit of Kings Peak, Utah’s highest point at over 13,500 ft. The first 11 miles are relatively straightforward, with free lakeside camping and abundant water sources throughout – a genuinely pleasant backpacking approach.
Mile 12 is where the route changes entirely. From there to the summit it is serious scrambling over giant boulders and loose rock, and previous scrambling experience is strongly advisable before you commit to the full push. Pack insect repellent alongside your usual alpine kit – the lakeside campsites are beautiful, and the mosquitoes know it.
11. The Colorado Trail, Durango to Denver
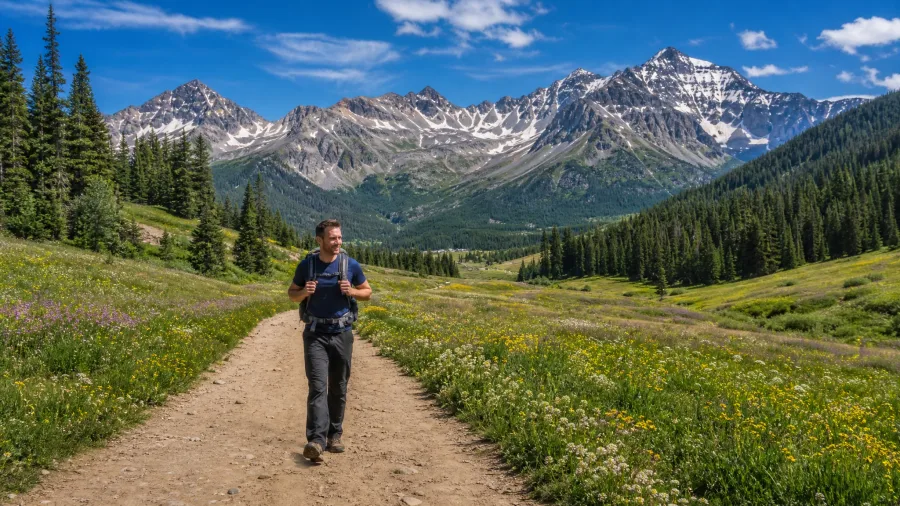
Kings Peak is one mountain, one summit, one hard day – the Colorado Trail is that same drive applied to an entire state.
It runs 486 miles from near Durango to near Denver, averaging above 10,000 ft of elevation for the whole route and cutting through some of the most remote backcountry in the Rockies. A full through-hike takes 4 to 6 weeks. But here is what makes it genuinely different from every other mega-trail on this list: it is divided into 33 numbered sections, each independently hikeable, which turns a six-week commitment into a realistic multi-year project for anyone who cannot disappear from work that long.
The trail is shared with mountain bikers and horseback riders on many sections, so standard yield etiquette matters – horses always have the right of way. The hikers who have finished it describe jagged peaks, alpine lakes, lush meadows, and evergreen forests stretching on for days. They also tend to describe the experience in terms that go well beyond scenery.
💡 PRO TIP
Section-Hike the Colorado Trail Over Years
Each of the 33 numbered sections has its own trailhead access, making it easy to complete the full trail over multiple trips. Download the Colorado Trail Foundation's free databook for GPS waypoints, water sources, and resupply points for each segment — it is the most useful single document for planning any section.
12. Rattlesnake Arches, McInnis Canyon, Colorado
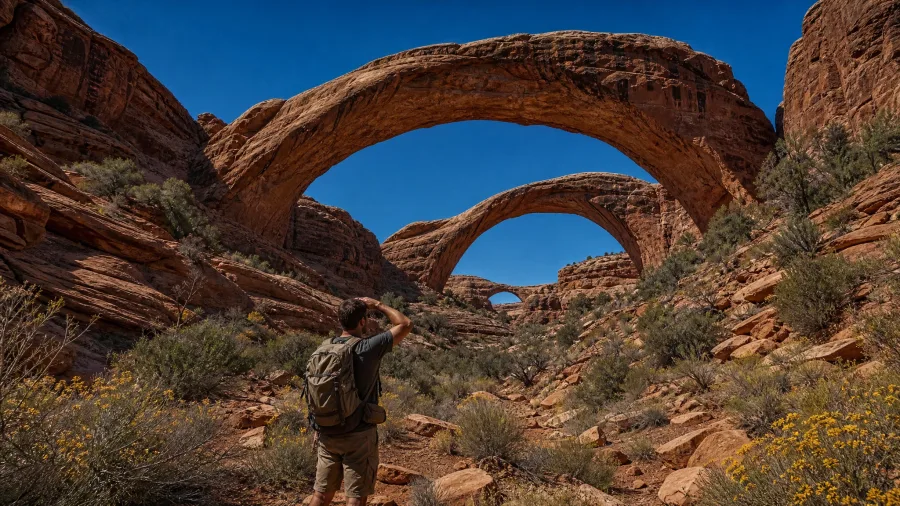
That scale of the Rockies can make you forget how much geological wonder is hiding just off the main tourist circuits – and Rattlesnake Arches in McInnis Canyon is the best example of exactly that.
The McInnis Canyon area near Fruita, outside Grand Junction, is home to over 40 natural sandstone arches — a concentration of this geological formation that surpasses any other location on the planet. Most visitors to the region drive straight to Arches National Park without ever knowing this place exists.
The main route is 15 miles round trip from the trailhead, with yawning canyons, desert wildflowers, and sandstone monoliths standing alongside the arches across the whole stretch. I took the full 15-mile route on my last visit, and it was absolutely the right call: the back half of the trail, once the day-tripper crowd thins out near the car park, is where the best formations appear. If you turn around early, you miss the whole point.
A serious 4×4 road offers an alternative approach that cuts the hiking to about 4 miles – useful if time is short, but you sacrifice a lot of the desert immersion that makes this place feel remote.
Desert conditions apply hard here. Start early, carry significantly more water than you think you will need, and plan the full 15-mile route as a long exposed day – there is no meaningful shade for long stretches, and heat builds fast on open sandstone in the afternoon.
13. Double O Arch, Devil’s Garden, Arches NP
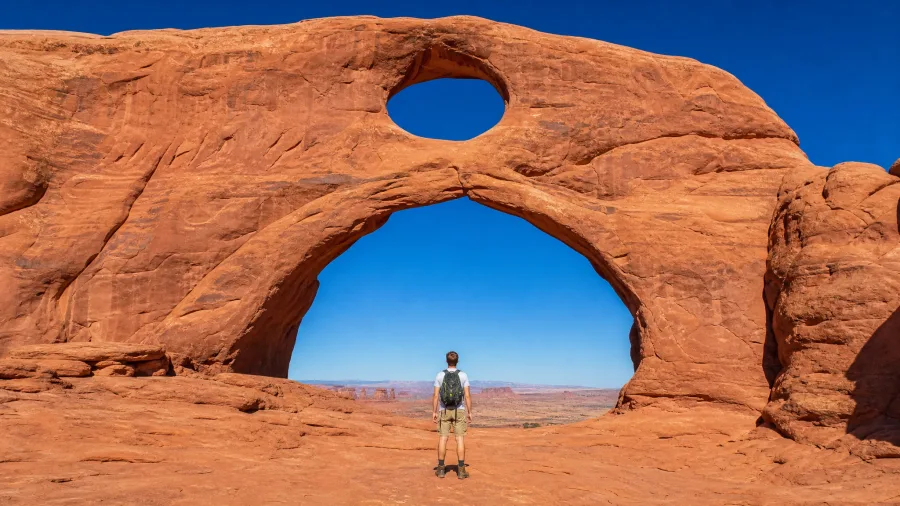
You are standing at Landscape Arch, photo taken, and the trail ahead looks quieter. Keep walking.
The Devil’s Garden Primitive Loop covers 4.2 miles total, but the vast majority of visitors turn around at Landscape Arch and head back to the car park. Push past it and the trail narrows onto long sandstone walls running high above the rocky ground below – exposed, a little vertiginous, and completely unlike anything on the main section. That approach delivers Double O Arch: the larger span is 71 ft wide and 41 ft tall, the second biggest arch in the entire park.
Carry ample water and wear full sun protection – open sandstone builds heat fast and there is no shelter in the back section of the loop. Go midweek or early morning to maximize the quiet back there; on busy days, the contrast between the crowded main loop and the emptiness beyond Landscape Arch is genuinely striking.
Double O Arch — At a Glance
📏 Trailhead
Devil's Garden Trailhead, Arches NP (end of main park road)
📐 Arch Span
71 ft wide, 41 ft tall
🏞️ Distance from Landscape Arch
Approx. 1 mile further — most visitors stop before this point
🌡️ Permits
None required for day hiking; free entry with park pass
👟 Best Window
Before 8 a.m. or after 5 p.m. — sandstone temps spike fast midday
Don't Miss
The primitive section uses cairns, not a worn path — losing the route on the fin walls is the most common mistake. Confirm each cairn before stepping onto exposed rock.
14. Havasupai Trail, Havasu Canyon, Arizona
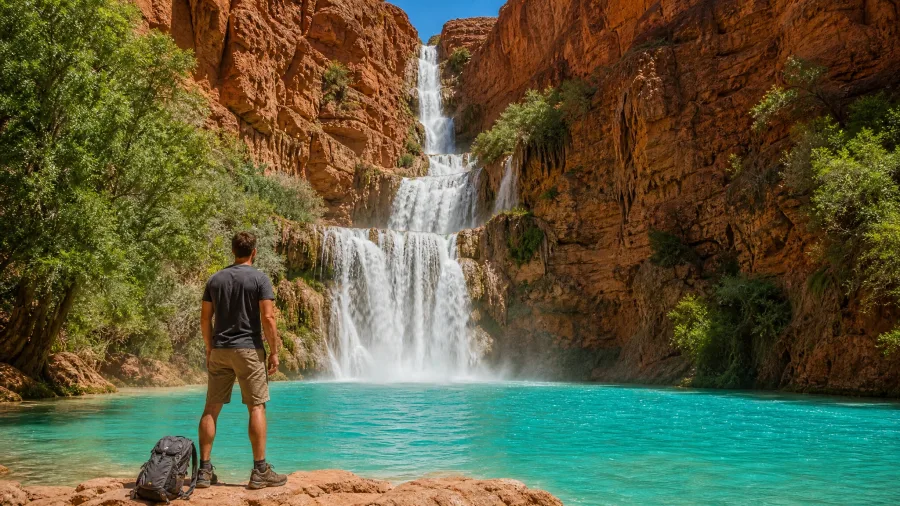
The permit lesson from so many trails on this list comes back harder here than anywhere else.
The Havasupai Trail runs 24.4 miles into Havasu Canyon on the Havasupai Indian Reservation, and no day hiking is permitted – every single visitor must book a lodge or campground reservation well before arrival. Havasu Falls drops five tiers into a turquoise pool that looks almost artificially vivid. Mooney Falls and Beaver Falls are both nearby and both worth the extra miles once you are in camp.
The descent involves limited shade, serious switchbacks, and unstable rocky ground throughout. Flash flooding is a real and serious risk in monsoon season – check the forecast before every day in the canyon and know the evacuation route before you ever need it.
Apply for permits as far ahead as possible and have backup dates ready. This is not a last-minute trip.
15. Kalalau Trail, Napali Coastline, Kauai
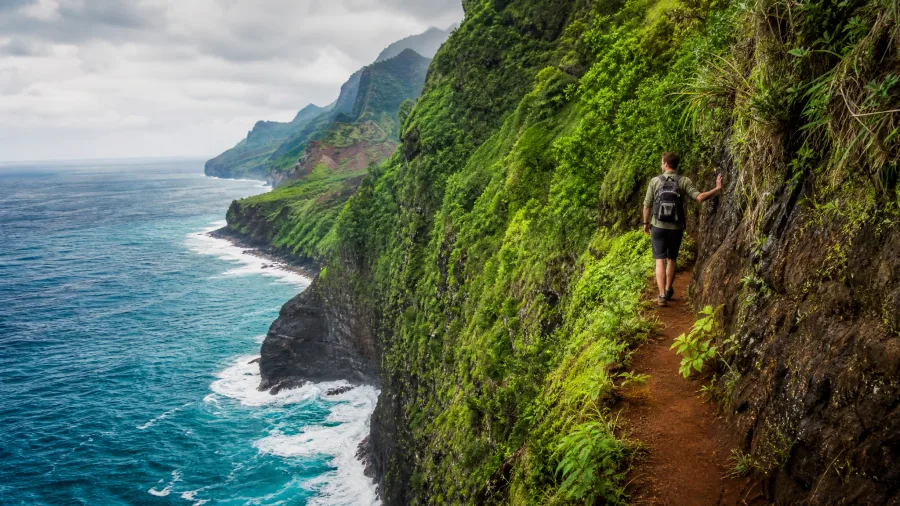
Havasupai keeps you safe from the water with planning and timing. The Kalalau Trail has a different kind of water to respect – and it is considerably less forgiving.
This 11-mile coastal route on Kauai’s Napali Coastline crosses verdant valleys and runs along narrow cliff-edge sections directly above the Pacific. The scenery is genuinely extraordinary. The beaches are not swimming spots. The choppy water along this trail has been linked to more than 100 hiker fatalities – treat every beach as a viewpoint only, no matter how calm it looks from the ridge above.
Eroded areas and exposed narrow sections run throughout the route, and the terrain punishes anyone who underestimates it. A permit from the State of Hawaii website is required in advance; they sell out fast, and applying many months ahead is not overcautious – it is the minimum realistic lead time.
I had planned to do this trail on my last Hawaii trip and simply ran out of time. I will be back for it. Do not attempt it solo – the combination of coastal exposure, unpredictable sea conditions, and route complexity makes a hiking partner genuinely non-negotiable here, not just a nice-to-have.
💡 Tip: Check the State of Hawaii's DLNR website directly for current permit release dates — third-party booking sites sometimes list incorrect availability windows.
16. Franconia Ridge Loop, White Mountains, NH
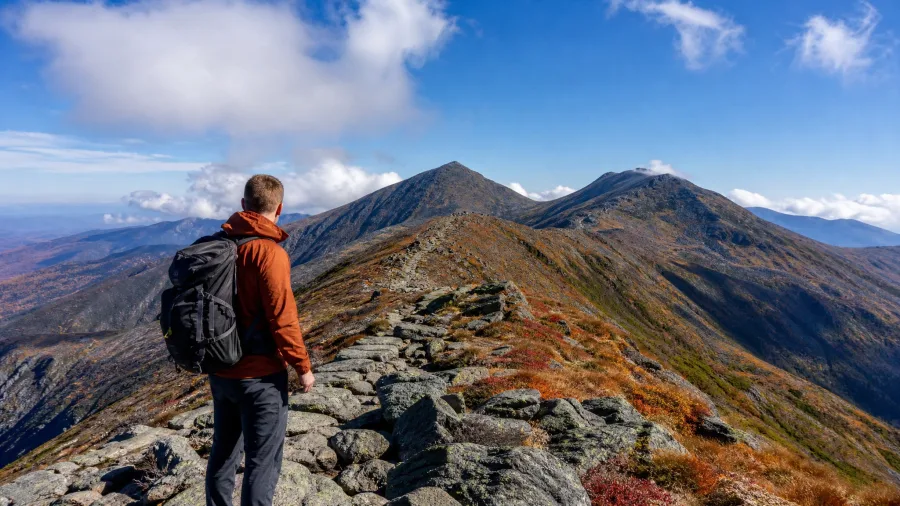
I grew up hiking the White Mountains every summer, and the Franconia Ridge Loop is my honest answer to that question.
The loop sits inside Franconia Notch State Park and takes about nine hours, packing nearly 3,500 ft of elevation gain into four miles as it crosses Little Haystack, Mount Lincoln, and Mount Lafayette. You can ascend via the Falling Waters Trail or the quieter Old Bridle Path – start early either way, because the crowds arrive fast and that exposed ridgeline turns hostile in afternoon weather faster than most people expect. National Geographic named it one of the top 20 dream trails in the world, and in my experience, it earns that every single time, in every season.
17. Longs Peak, Rocky Mountain National Park
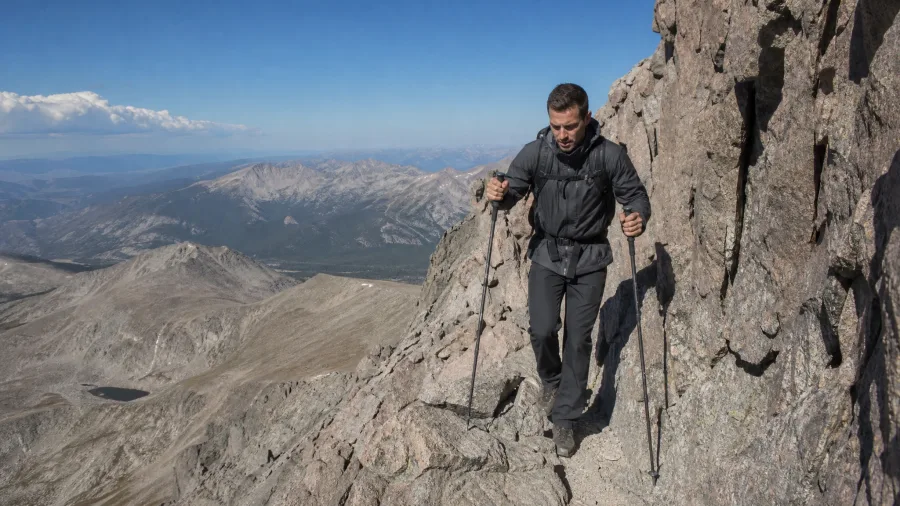
Longs Peak was my first backpacking trip and my first 14er – done solo, with nearly every beginner mistake checked off.
The trail runs 15 miles with a summit above 14,000 ft in Rocky Mountain National Park. You move through forest, a wildflower alpine zone, and past Chasm Lake before the terrain tightens into the Narrows – a narrow, exposed section near the top that demands your full attention and is absolutely not the place to discover a fear of heights. Day hikers typically start around 2 a.m. to clear the summit before afternoon lightning builds. For overnight camping at the Boulderfield – the designated area just below the Narrows – you need a backcountry permit and a bear canister.
I overpacked, set out late, and dropped my phone off the mountain. Still made camp by nightfall. Still summited on day two. The lesson isn’t that the peak is forgiving – it isn’t – it’s that solid preparation matters far more than a perfect execution, and that summit feels genuinely earned.
18. Lost Coast Trail, Northern California
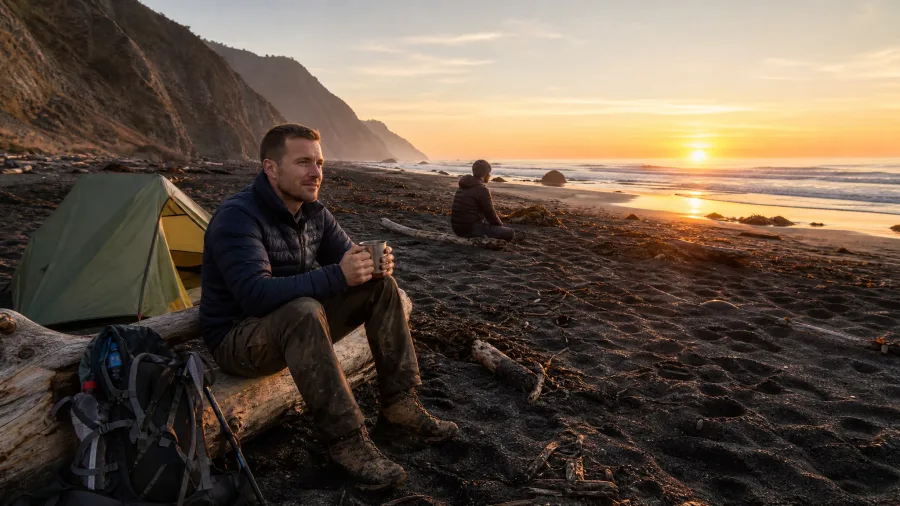
Reaching a high summit recalibrates what a trail can feel like – the Lost Coast does exactly the same thing, just at sea level.
The full route is 38 miles: a northern section of nearly 25 miles running through Mattole and Black Sand Beach, and a southern 19-mile section through Sinkyone Wilderness State Park, taking in Hidden Valley and Needle Rock. You camp on the beach the whole way, with whales and sea lions for company. It takes two to four days, and the near-total absence of road access gives this trail a genuine remoteness that’s increasingly hard to find in California.
Permits are released every October. Mark the date and apply the moment that window opens – they go fast.
19. Teton Crest Trail, Grand Teton, Wyoming
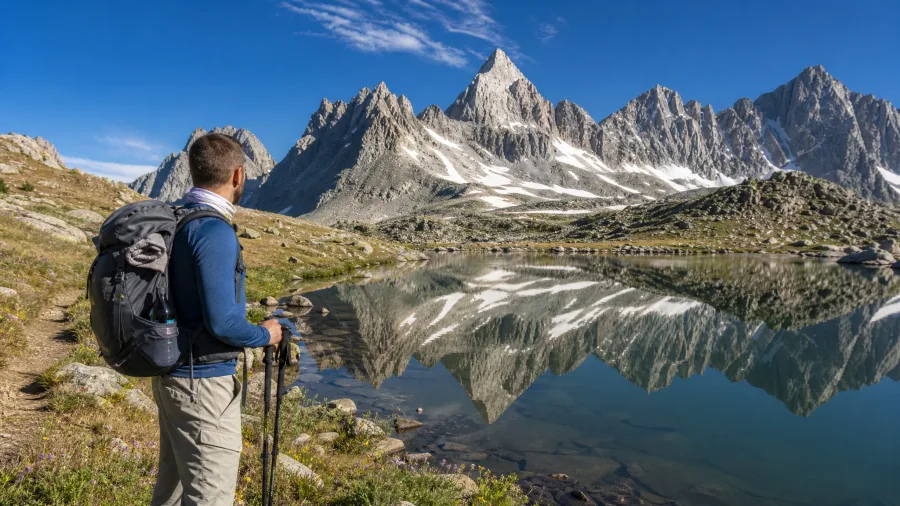
Every trail on this list has something that sets it apart – a summit, a waterfall, a coastline – but if one route captures what serious alpine backpacking in the US actually looks like, it’s the Teton Crest Trail.
Forty miles, over 9,000 ft of elevation gain, and a minimum of three days to do it right. The route crosses the Rendezvous Mountains, reaches Marion Lake, and follows the ridge out to the Death Canyon Shelf – moving through dense national forest, past high-elevation alpine lakes, and up into glaciers and wildflower-covered slopes on the high sections.
What makes it genuinely different is the sustained quality of the views. The 360-degree mountain panoramas hold for miles at a time in the upper sections – not a single dramatic moment, but an extended stretch of scenery that almost nothing else on this list can match.
The logistics take real effort: there are multiple trailhead options to choose between, designated backcountry camping zones throughout, and bear country the entire way. Treat the permit research and gear planning here with the same seriousness you’d bring to any serious alpine route. This one rewards preparation.
💡 Tip: The Teton Crest Trail can be hiked in either direction — south to north via Teton Village gives you the steepest elevation early and easier terrain as your legs fatigue across the later days.
Where to Start If You Have Never Backpacked
A list this long can feel paralyzing if you’ve never spent a night on trail, so here’s a direct answer about where to actually start.
For day hikes with low logistics overhead, Avalanche Lake in Glacier National Park is the most accessible entry point on this list – no permit required, moderate fitness, spectacular scenery. The Beehive Trail in Acadia is short and intense but still a single day out with no overnight complexity. Cloudland Canyon works beautifully as a weekend car-camping trip with zero backcountry permit process.
For a first overnight, Big Pine Lakes is the strongest candidate here. The North Fork trail is clearly marked, water sources are frequent, campsites are established, and stopping at the lower lakes keeps the mileage manageable. It gives you a real Sierra experience with a sensible bail-out option if something goes sideways.
Be honest about the routes that aren’t for first-timers. Longs Peak, Kalalau, Havasupai, and the Lost Coast all carry real consequences – altitude, coastal hazards, flash flooding, extreme remoteness – that a hiker without prior overnight experience isn’t equipped to handle.
Before you commit to any permit-required or remote route, do at least one overnight trip on a well-marked, well-trafficked trail close to home. Test your gear weight, your sleep quality at elevation, and your actual daily pace before you book anything competitive. The trails on this list will still be there.
What to Pack for a Multi-Day Backpacking Route
The trails on this list split into three terrain types, and each one has a gear demand the others do not – which means one generic checklist will quietly fail you on at least one of them.
Alpine and glacier routes – Sahale, Longs Peak, the Teton Crest – need insulation layers even in July, because ridgeline temperatures drop fast once the sun goes behind a peak. Traction devices matter too if you are crossing any lingering snow, and a bear canister is non-negotiable: it is legally required for overnight camping on Longs Peak and throughout the JMT corridor in the Sierra Nevada. Do not arrive without one and expect to sort it out at the trailhead.
Desert routes demand a different kind of discipline. On Havasupai, Double O Arch, or Rattlesnake Arches, carry more water than you think is reasonable, apply sun protection before the first mile, and accept that shade does not exist – which means your start time and your midday pace both need to change.
Coastal routes, Kalalau and the Lost Coast, need fully waterproof layers and real attention to tide tables. On the Lost Coast, certain beach sections are only passable at low tide, and getting that wrong is not an inconvenience – it is a full day lost or a genuine hazard.
Across all three types, aim for a base pack weight under 30 lbs. Anything significantly heavier compounds the suffering on high-elevation days, and it is the source of most first-timer regrets I hear about after a long route. Check each trail’s official trip-planning page before you go – permit zones, bear canister rules, and seasonal conditions shift every year.
🗓️ How to Plan a Permit-Required Backpacking Trip
Pick Your Trail and Dates
Decide on your trail and a target travel window at least 6 months out — permit demand determines how far ahead you need to plan.
Find the Permit Release Date
Visit the official park or Recreation.gov page to confirm exactly when permits for your chosen dates become available.
Complete a Practice Overnight First
If this is your first multi-day trip, do one overnight on a local well-marked trail to test gear weight, sleep quality, and daily pace before you commit.
Apply the Moment the Window Opens
Log in early on the release day — popular permits like JMT and Half Dome cables sell out within minutes of becoming available.
Assemble and Test Your Kit
Pack your full kit, weigh it, and do a weighted shakeout hike locally before the trip — never arrive at a trailhead with untested gear.
Check Conditions One Week Out
Review current trail reports on AllTrails or the park's own site for snow levels, water sources, and any closures that affect your route.
Frequently Asked Questions
Which trails on this list require permits and how do I get them?
Yosemite backcountry camping, Half Dome cables, the John Muir Trail, Sahale Glacier camping, Big Pine Lakes overnight, Havasupai lodge or campground, Kalalau, the Lost Coast, and Longs Peak overnight all require advance permits. Check Recreation.gov and each park or state’s official website for current release dates and application processes — they vary by trail and change seasonally.
What is the easiest hike on this list for someone who is not very fit?
Avalanche Lake in Glacier National Park is the most accessible — nearly 6 miles out and back, no permit required, and moderate elevation gain. Cloudland Canyon in Georgia is another strong option if you want a weekend trip with on-site accommodation and a very manageable trail.
Do I need a bear canister for any of these trails?
Yes — a bear canister is legally required for overnight camping on Longs Peak and throughout the John Muir Trail corridor in the Sierra Nevada. It is strongly advisable for Teton Crest, any Sierra Nevada overnight, and wherever you are camping away from established bear box infrastructure. Check the specific trail’s current regulations before packing.
Can I do any of these trails as a solo hiker?
Most entries are manageable solo with experience. The Kalalau Trail is the one clear exception — the combination of eroded coastal sections, unpredictable sea conditions, and remote terrain makes solo hiking genuinely inadvisable there. Longs Peak solo is possible but demands serious preparation and an early start; I did it, but I would not recommend it as a first solo overnight.
When do Lost Coast Trail permits go on sale?
Lost Coast permits are released every October for the following season. Mark that release date on your calendar and apply the moment the window opens — they move fast and availability is limited to protect the trail’s remote character.
What is the best time of year to hike the Havasupai Trail?
Spring (March to May) and fall (September to November) are the most comfortable windows — summer temperatures in Havasu Canyon are extreme and shade is limited throughout the trail. Avoid monsoon season (roughly July through September) entirely due to serious flash flood risk; check weather forecasts before every day in the canyon even in shoulder season.
Matching Your Trail to Where You Actually Are Right Now
If you have never hiked in a national park, start with Avalanche Lake — no permit, genuine scenery, accessible fitness bar. When you are ready for your first overnight, Big Pine Lakes gives you the Sierra Nevada with a safety net: clear trail, established camps, and a bail-out option at Lake 2 if anything feels off.
For serious backpackers building a real bucket list, the John Muir Trail, the Teton Crest, and the Lost Coast are the three that belong on every short list. They are different in every way — Sierra granite, Wyoming alpine, California coast — but each one delivers the kind of experience you measure the rest of your hiking life against.
The concrete action to take today: figure out which trail is calling you, find out when its permits open next, and put that date on your calendar right now. Everything else — the gear, the fitness, the planning — follows from that one committed step.
Your Permit Date Is the First Domino
Find the permit release date for your chosen trail on Recreation.gov or the park's official site and block it in your calendar today — every other part of the trip falls into place once that date is locked.