15+ Single Container Home Designs You Can Build on a Small Lot

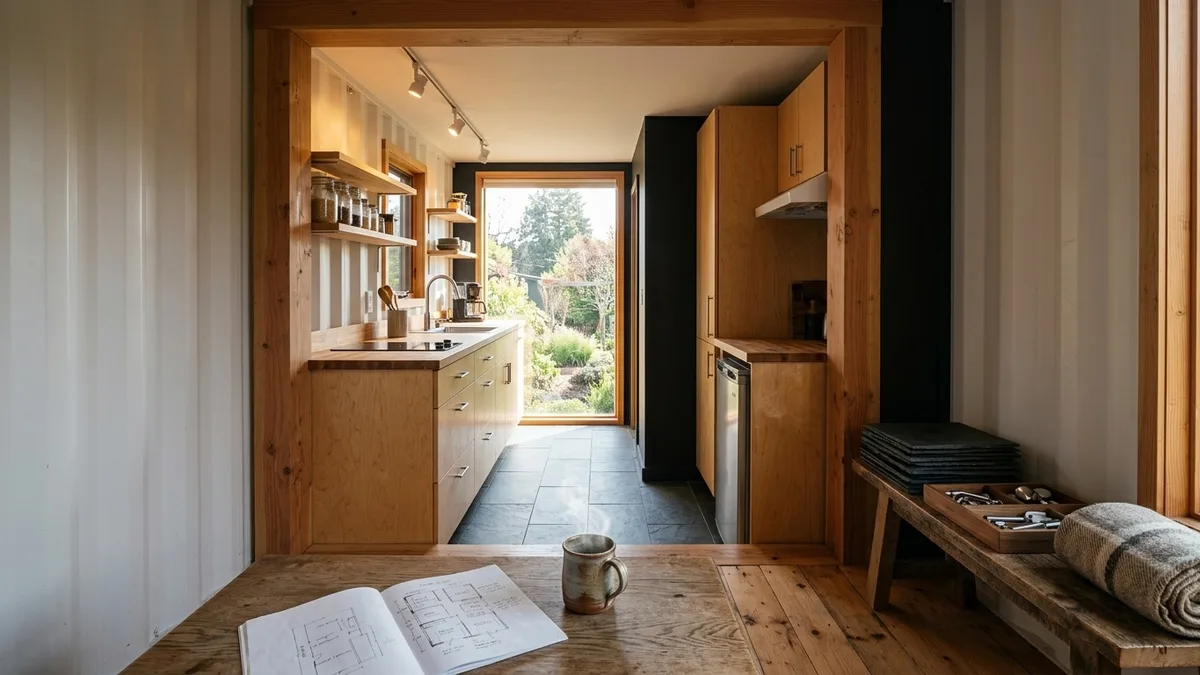
A 40-foot high-cube shipping container delivers exactly 320 square feet of enclosed floor space, turning a narrow steel tube into a remarkably efficient dwelling when every inch serves a distinct purpose.
Dropping this compact structure onto a tight 30×50 foot plot requires strict adherence to spatial clearances and clean utility routing to avoid costly mistakes during construction.
For anyone working with a modest 45,000 to 75,000 dollar finished budget, choosing the right floor plan prevents wasted materials and months of frustrating redesigns.
The following 15 distinct layouts break down exact configurations, multi-use zones, and spatial tricks to help you maximize your small plot without sacrificing daily comfort.
Quick Tips Before You Start
Verify Clearances
Check local setback requirements before pouring your foundation slab.
Spray Foam Insulation
Use closed-cell foam to prevent condensation and maximize thermal efficiency.
Bundle Utilities
Keep water, sewer, and power lines grouped along a single wet wall.
1. Open-Concept Studio with Lofted Sleeping Quarter
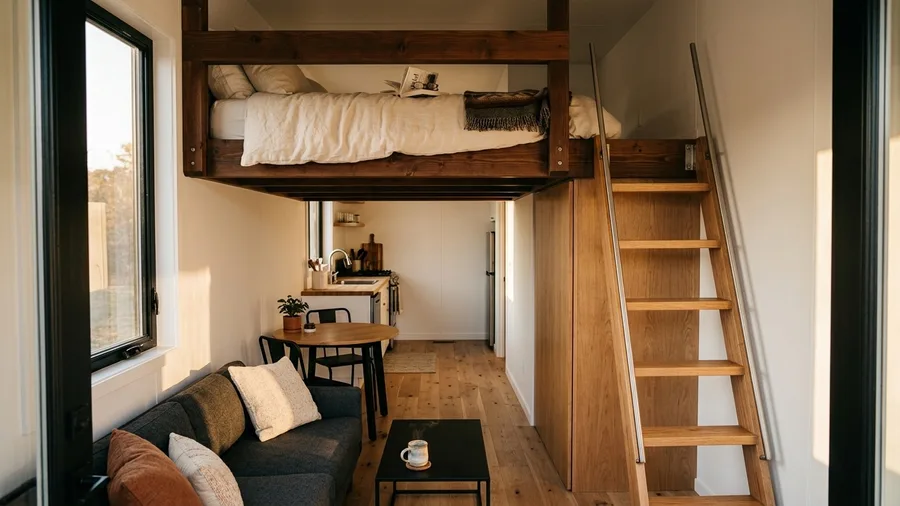
Traditional tiny home layouts squeeze the bed and living zone onto a single floor, resulting in a cluttered room that feels smaller than its actual footprint.
By utilizing a 40-foot high-cube shipping container, this design carves out a vertical solution that keeps the ground level completely free for daily living.
A sturdy timber-framed sleeping loft sits securely overhead, positioned directly above the compact mechanical closet while maintaining 6 feet of vertical clearance below.
A space-saving ship ladder featuring flat oak treads mounts tightly against the sidewall to provide safe access to the mattress without stealing floor space from the main seating area.
The ground floor dedicates 180 square feet entirely to an open living and dining combination, anchored by a low-profile wool sectional in charcoal and a matte black steel coffee table.
💡 Tip: Mount reading sconces directly to the loft framing to eliminate the need for bedside tables.
At a Glance
2. Linear Galley Kitchen and Living Core
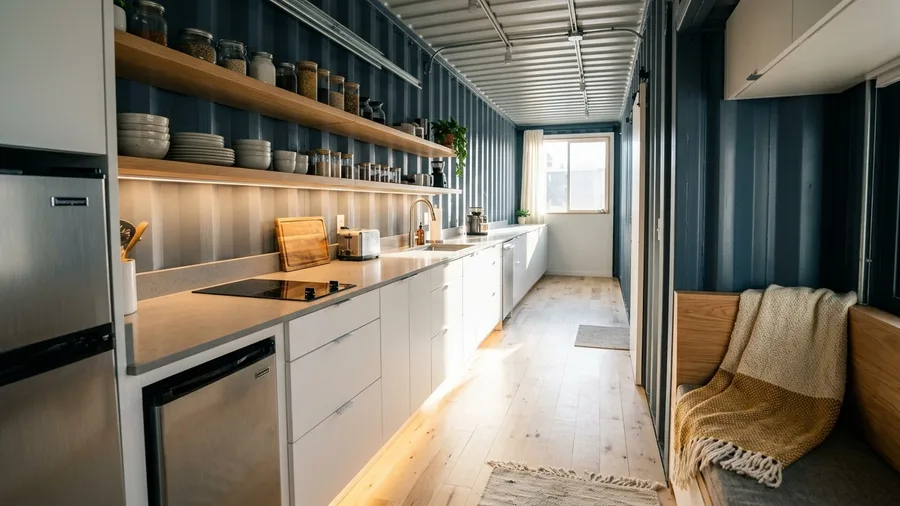
While double-sided layouts chop a narrow footprint in half, a single unbroken wall preserves precious floor space. Narrow floor plans demand linear efficiency, especially when morning light hits from an end-wall window.
Morning sun streams directly down the length of the container, bouncing off matte white lower drawers and illuminating the counter surface before shifting overhead by noon. As afternoon fades, under-cabinet task lighting takes over, casting a warm glow across open oak shelving and the adjoining seating zone.
Arranging the kitchen along a 12-foot single wall leaves the opposite side entirely open, housing a compact 24-inch refrigerator and a two-burner induction cooktop without feeling cramped.
A clear 3-foot aisle guarantees completely unobstructed daily movement.
⚠️ COMMON MISTAKE
Avoid Oversizing Kitchen Appliances
Standard 30-inch refrigerators ruin narrow layouts. Stick to apartment-scale 24-inch units to preserve vital aisle clearance.
3. L-Shaped Modular Kitchen Layout
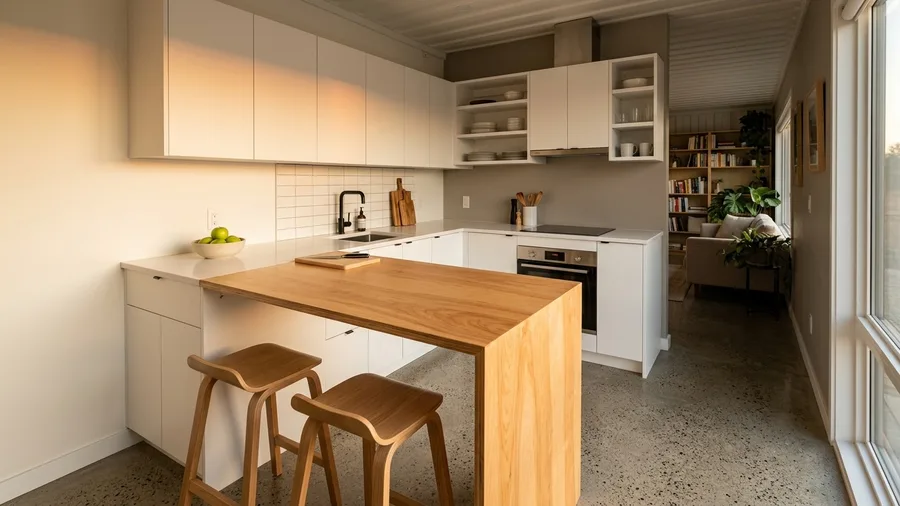
The kitchen opens up into a surprisingly fluid workspace where cooking and dining share a single uninterrupted sweep of oak and steel.
Wrapping cabinetry into an L-shape transforms the short end of the container into a high-capacity cooking station that leaves a 36-inch clearance for the main walkway.
A multi-use birch plywood dining peninsula extends from the counter return, seating two people while doubling as extra prep space during dinner preparation.
Kitchen Layout Specs — At a Glance
📏 Counter Run
12 Linear Feet
↔️ Aisle Width
36 Inches
🔥 Cooktop
2-Burner Induction
Pro Design Rule
Keep sink and cooktop separated by at least 24 inches of uninterrupted prep surface.
4. Pocket Office and Living Combo
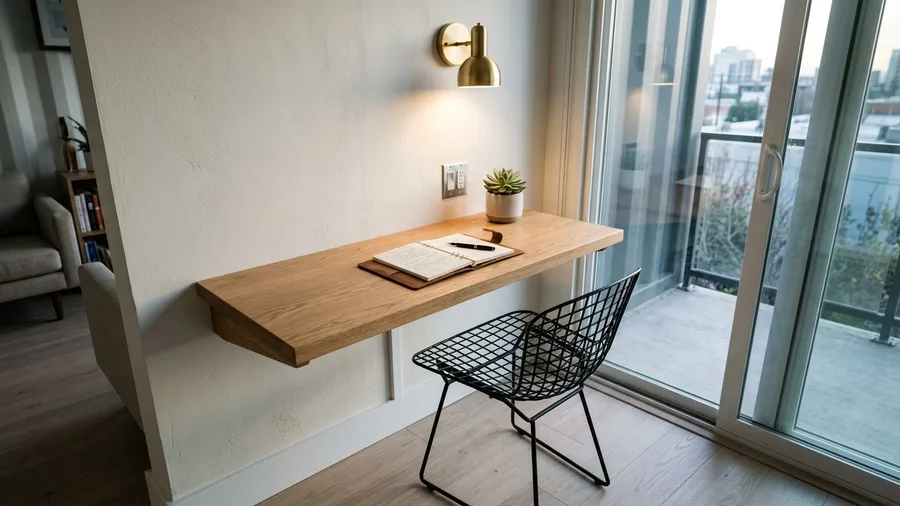
Square footage limits force remote work setups into cramped corners unless the layout prioritizes vertical wall space.
A floating forty-eight-inch oak desk mounts directly beneath a high-output wall sconce, paired with an ergonomic matte black wire chair to maximize knee clearance in tight quarters.
Positioning the workstation right beside the floor-to-ceiling glass sliding entry floods the surface with natural daylight, eliminating the need for bulky desk lamps.
Concealed cable raceways run behind the baseboards to keep power cords completely out of sight, while dual USB wall outlets eliminate clutter.
Container Build Approaches
Smart Small-Lot Layouts
- Centralized wet walls for easy plumbing
- Vertical lofting to preserve floor space
- Multi-use furniture like Murphy beds
- Strategic low-E glass placement
Common Mistakes to Avoid
- Oversized 30-inch kitchen appliances
- Scattered plumbing fixtures across the frame
- Unreinforced sidewall window cutouts
- Ignoring local setback regulations
5. Compact Center Bath Floor Plan
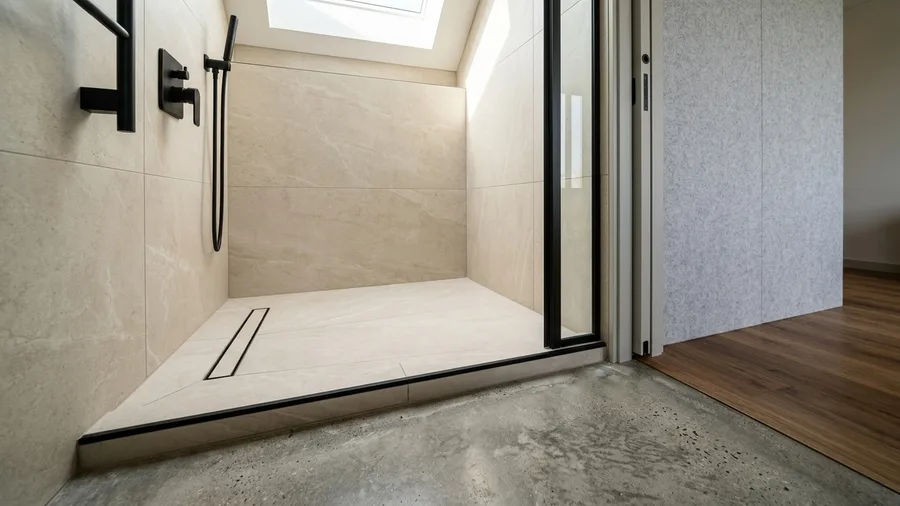
Borrowing the efficient wet-core planning seen in mid-century maritime architecture, this layout organizes compact living around a central anchor.
Plumbing runs dictate the layout budget of any modular build.
Locating the bathroom directly in the middle of the 40-foot container creates a shared wet wall that dramatically cuts down on pipe lengths and installation labor.
A custom 3×5 foot walk-in shower features matte black fixtures and a linear floor drain, framed by water-resistant cement backer board and large-format porcelain tile in a warm bone tone.
A space-saving 24-inch pocket door slides silently into the interior partition wall, completely eliminating the door swing clearance required by traditional hinged doors while keeping all water supply and drainage lines tightly bundled.
💡 Tip: Use a tankless propane or electric water heater mounted externally to free up interior utility space.
🌱 GROWING TIP
Mastering Central Plumbing
Clustering your kitchen and bathroom back-to-back cuts material costs in half and simplifies winterization.
6. End-Entry Mudroom and Living Zone
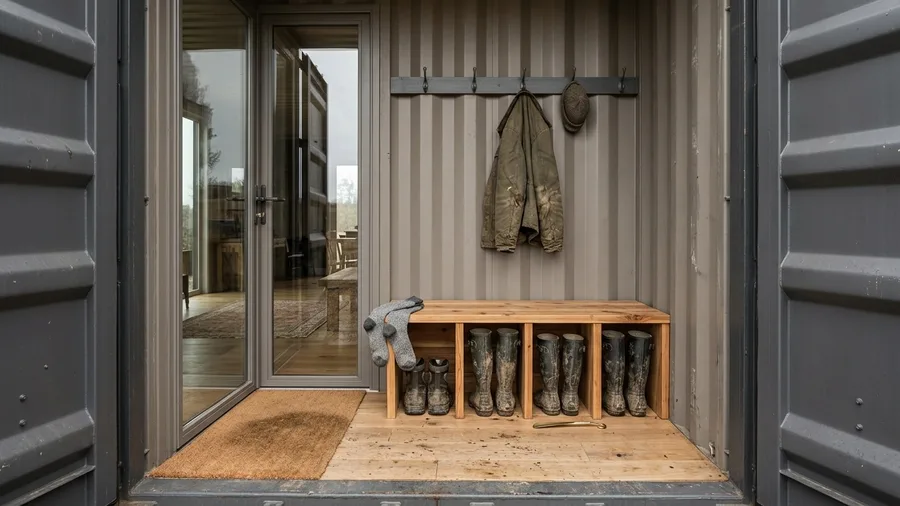
Corrugated steel end-doors frame the threshold where outside weather meets finished living space inside a 40-foot high-cube shipping container.
A secondary glass storm door installed behind the outer steel panel creates a functional 3-foot transitional foyer that blocks wind-driven rain.
Beneath charcoal wall hooks, a built-in cedar storage bench measuring 36 inches long by 16 inches deep holds six pairs of muddy boots in open shoe cubbies.
This barrier protects white oak flooring from moisture damage while keeping everyday outerwear contained before stepping into the main living zone.
Mudroom Setup Checklist
-
Install a heavy-duty moisture barrier mat Extends flooring life by catching grit.
-
Mount double coat hooks at varying heights Accommodates both long winter coats and bags.
-
Choose slip-resistant tile for the entryway zone Prevents slips when wet.
7. Full-Wall Glass Sliding Door Integration
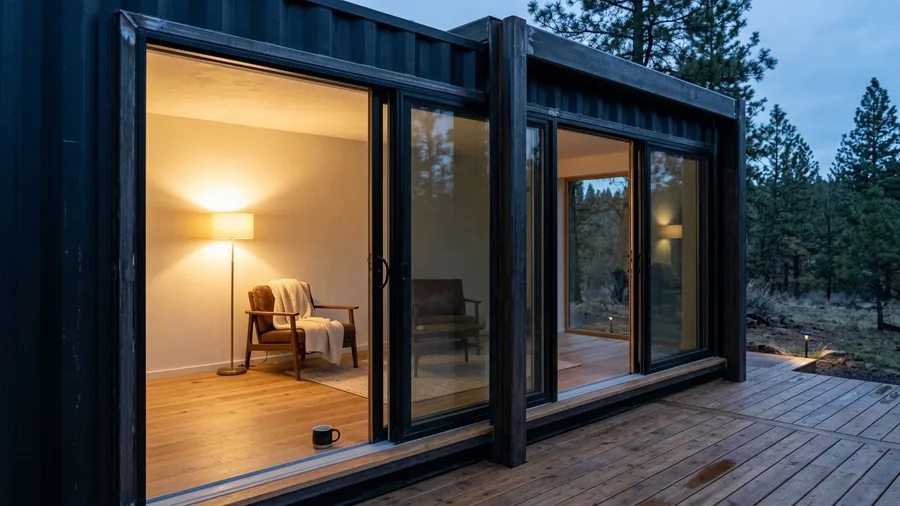
Replacing the solid steel envelope with expansive glass sliding panels instantly expands the visual footprint by fusing the compact interior with an outdoor zone.
Safely removing a ten-foot section of the corrugated sidewall inside the 320-square-foot footprint requires careful engineering. Builders weld a four-inch structural steel tube frame directly into the opening to redistribute overhead roof loads without compromising structural integrity.
Double-paned low-E glass panels maximize natural daylight and thermal performance while serving dual functions as a weather barrier and an open-air threshold.
Stepping straight onto cedar expands living space.
Top Exterior Connection Upgrades
8. Built-In Storage Bench Window Seat
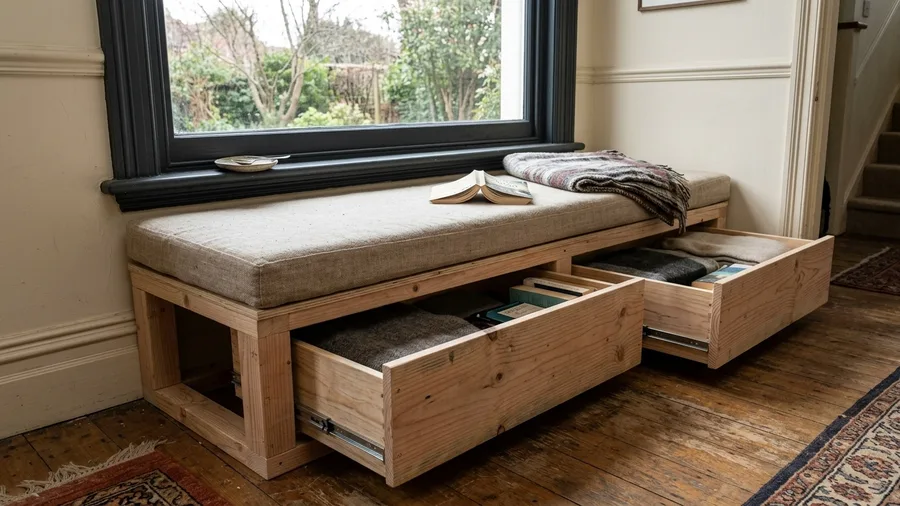
Allowing an 18-inch depth and a 16-inch finished height creates the exact clearance needed to house bulky winter bedding and suitcases beneath a 6-foot span.
Constructing the frame out of 2-by-4 dimensional lumber directly against the corrugated steel wall locks the structure in place while concealing deep lower pull-out drawers on heavy-duty side-mount slides.
A high-density foam cushion wrapped in natural linen fabric turns the timber box into a comfortable daytime reading nook that eliminates the floor space required by standalone chairs.
9. Murphy Bed Living Room Transformation
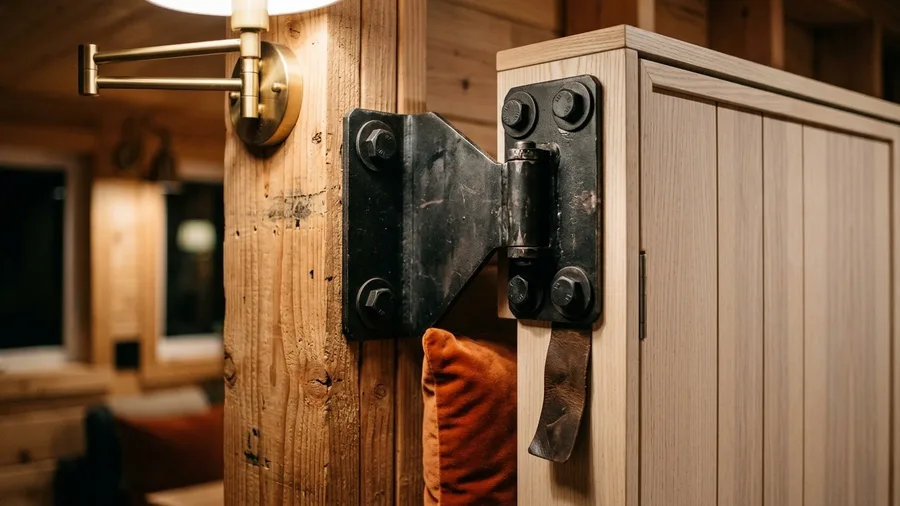
A dedicated bedroom eats up half a tiny container’s potential living space.
Heavy-duty steel wall anchors and reinforced interior framing support a queen-sized Murphy bed mechanism that folds flat against the partition wall when not in use. The timber wall studs require doubled 2×6 framing secured with structural bolts to manage the vertical load and pivoting torque.
Daytime clearance increases from zero to 10 feet, turning the bedroom into a spacious lounge complete with a floating oak media console and a low-slung wool sectional sofa. Transitioning the room from sleeping mode to living mode takes less than 60 seconds of setup time each morning.
This dynamic dual-purpose layout proves you do not need separate rooms to live large in a 320-square-foot footprint.
💡 Tip: Choose lightweight bedding quilts that secure easily with elastic straps before folding the frame upward.
10. Raised Floor Storage and Utility Cavity
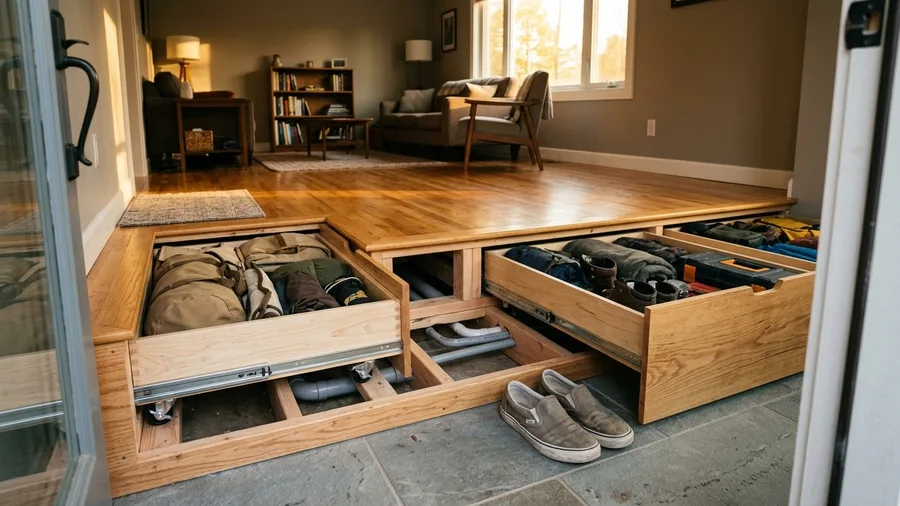
Concealing utilities in a 40-foot high-cube shipping container set on a concrete slab requires a raised subfloor framing system that packs dual functionality into a tight footprint.
An 8-inch raised subfloor built with dimensional framing lumber creates a continuous utility cavity underneath the living space to neatly route all wastewater drainage lines and electrical conduit runs away from view.
Custom heavy-duty rolling caster drawers pull out smoothly from the floor kickplate along the perimeter, giving the room deep storage for bulky seasonal gear while maintaining instant access panels for plumbing maintenance.
11. Compact Stacked Laundry Alcove
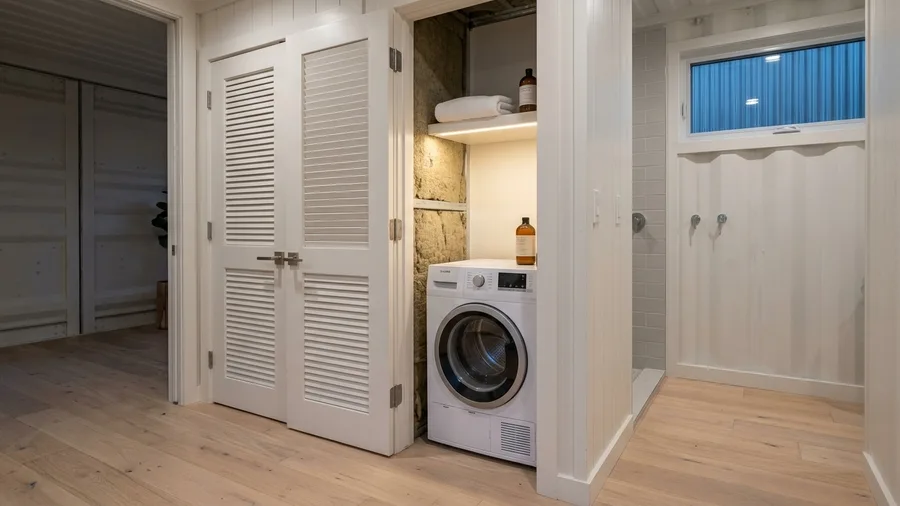
Solid core louvered wood painted in crisp bone white houses the utility zone, keeping mechanical clatter hidden while allowing necessary airflow into the compartment.
A dedicated 30-inch wide utility closet houses a compact stacked washer and ventless dryer unit right next to the bathroom wet wall, fitting neatly within a remarkably tight 6 square foot footprint.
Acoustic mineral wool insulation packed tightly inside the surrounding wall cavity dampens vibration noise during high-speed spin cycles, preventing mechanical thumps from echoing through the steel structure.
Ventless condensation drying technology eliminates the need to cut exhaust ducting through the corrugated steel exterior wall, preserving weatherproofing integrity.
Washing clothes locally without communal laundromats is a major priority for tiny home owners seeking independent daily routines.
💡 Tip: Place a rubber anti-vibration mat underneath the washing machine to protect your subfloor seams.
12. Double-End Glazed Studio Retreat
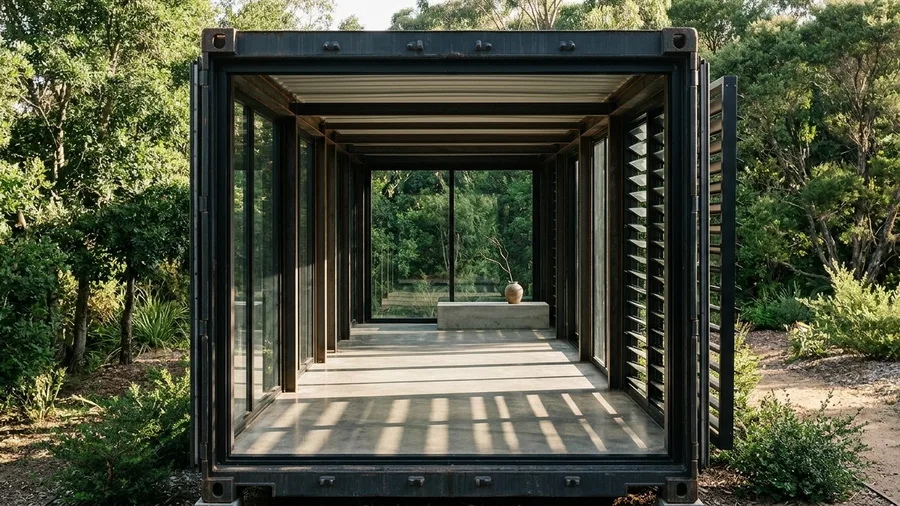
Eight inches of clearance behind the exterior frame allows full-height tempered glass panels to span both 8-foot short ends of the 40-foot container.
Long metal tubes can easily trap shadows at their centers if light only enters from one end.
Glazing both short ends of the 40-foot container with full-height tempered glass panels creates an uninterrupted line of sight through the entire structure, allowing natural daylight to reach every corner.
Strategic cross-breeze ventilation flows naturally from front to back, while exterior metal louvered shades block harsh afternoon sun.
13. Murphy Table Dining and Workspace
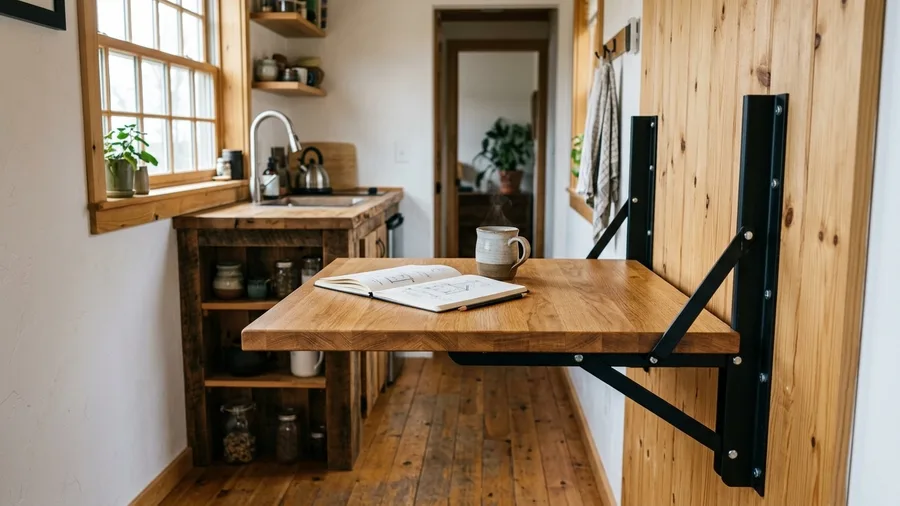
Permanent dining tables take up valuable floor space that is needed for circulation during the day.
Morning light floods through the side window, illuminating the oak butcher block surface as it drops down from the vertical panel.
A heavy-duty folding drop-leaf table mounts securely to the kitchen wall studs using steel locking brackets rated for 250 pounds.
When folded down flat against the wall, it projects less than 4 inches into the room, leaving the main hallway completely unobstructed.
This clever expanding surface seats four guests for dinner before folding away instantly to restore open floor space.
💡 Tip: Use magnetic catches to secure the drop-leaf firmly against the wall when folded upward.
14. Integrated Corner Porch Cutout
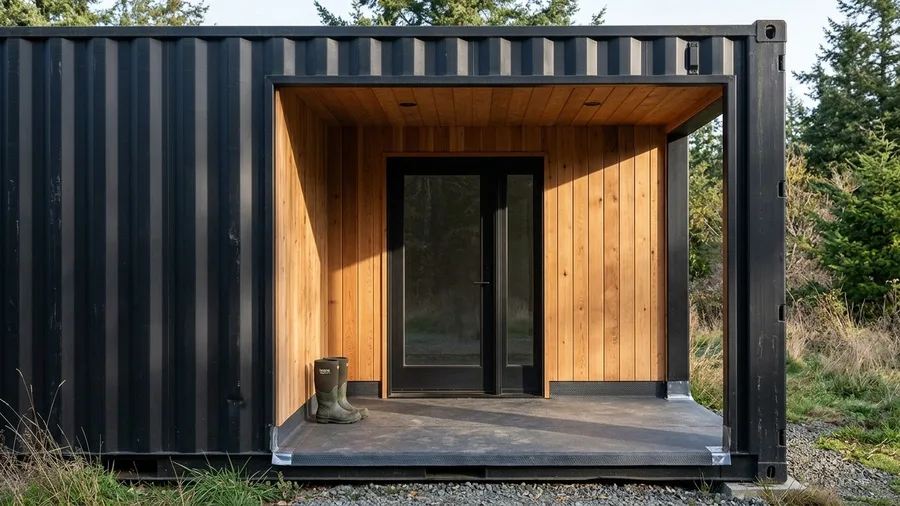
External covered porches usually require building separate roof structures on your small lot.
Slicing away an inner 4×8 foot corner section of the container leaves the structural corner posts intact to support the roof load.
Flashing the recessed floor and walls with heavy-duty EPDM waterproof membrane creates a weather-tight sheltered entryway and outdoor sitting alcove.
This precise cutback maximizes your usable exterior transition space while strictly preserving the narrow forty-foot transport footprint.
15. Minimalist Utility Core Layout
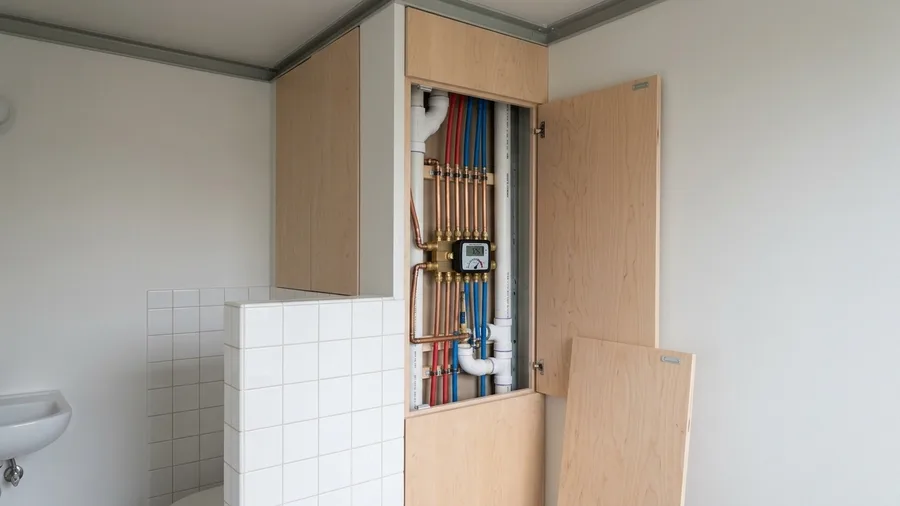
Borrowing from industrial marine architecture where every linear inch counts, this compact wet-wall layout consolidates all water lines into a single, highly efficient utility core.
Designing a shared wet-wall engineering strategy packs the water heater, supply manifolds, and drain stacks into a single 4-foot vertical shaft.
Removable magnetic access panels allow instant maintenance checks without tearing into finished drywall or tilework while pipe run lengths stay under 10 feet total.
💡 Tip: Label every shut-off valve clearly with engraved tags for quick emergency isolation.
Frequently Asked Questions
What is the minimum lot size required for a 40-foot container home?
A 30×50 foot footprint provides enough space for placement, clearance, and local setback requirements.
How much does a fully finished single container home typically cost?
Finished builds range from $45,000 to $75,000 depending on interior finishes, custom cabinetry, and utility hookups.
What foundation type works best on small urban lots?
Helical piers or concrete slabs provide stable support while minimizing ground excavation on tight plots.
How long does it take to complete a single container home build?
Most projects take between 4 to 6 months from initial site placement and framing to final move-in readiness.
How do you handle insulation in a steel shipping container?
Closed-cell spray foam applied to the interior walls provides maximum R-value and prevents condensation buildup.
Evaluating Site Constraints and Floor Plan Flow
Before ordering your steel shell or locking down a specific floor plan, walk your 30×50 foot plot with a measuring tape to map exact sun angles and utility stub locations. Local zoning boards typically require three-foot side setbacks, which will immediately dictate whether a wide porch cutout or a linear gallery layout fits your legal boundary lines.
Spend an afternoon tracing your actual daily routine on graph paper to test aisle clearances and door swings before pouring your concrete slab or setting helical piers. A well-placed utility wall or a compact wet-core layout will save you thousands in plumbing runs during the four to six month build timeline.